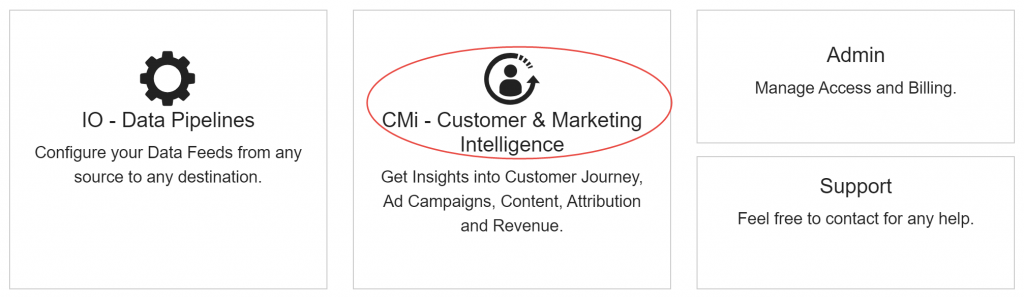
CMi is a marketing data warehouse and customer data platform in the cloud. It provides the ability to
- Collect first and third party data into an integrated data model.
- Unify customer touch points across all platforms and channels.
- Link content, ad campaign, emails, revenue and customer data to generate AI driven insights.
- Sign-In to Electrik.AI,On the Home Page, click on Admin.
- On the Navigation bar, click Projects.
- Click on the desired Project to enable CMi.
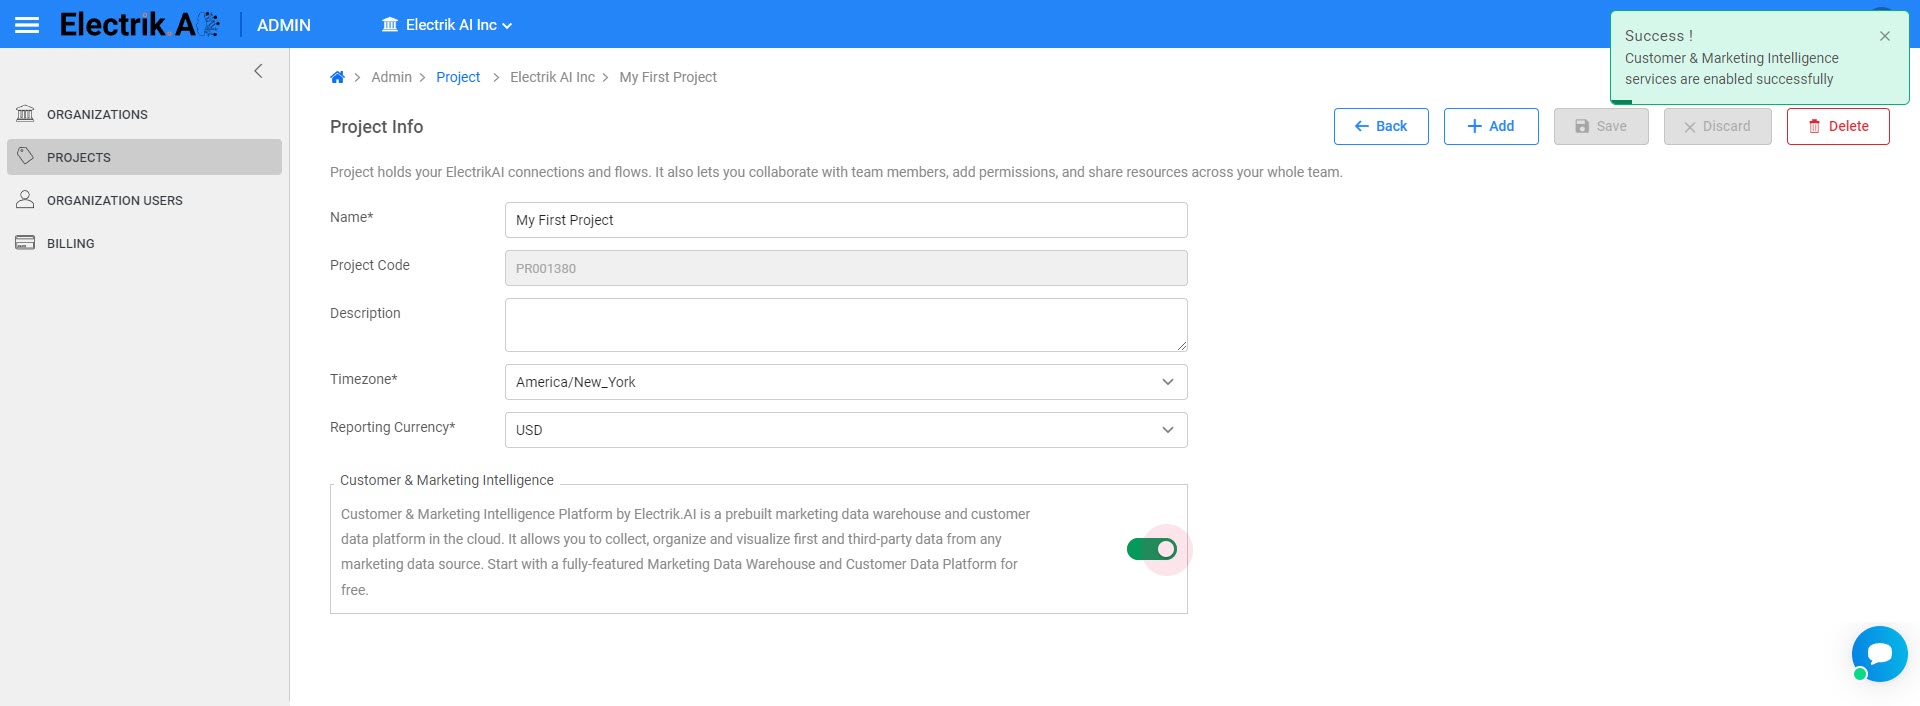
Turn On the Customer & Marketing Intelligence by using toggle button.
You have successfully enabled Customer & Marketing Intelligence Platform for your project. Detailed Steps Here.
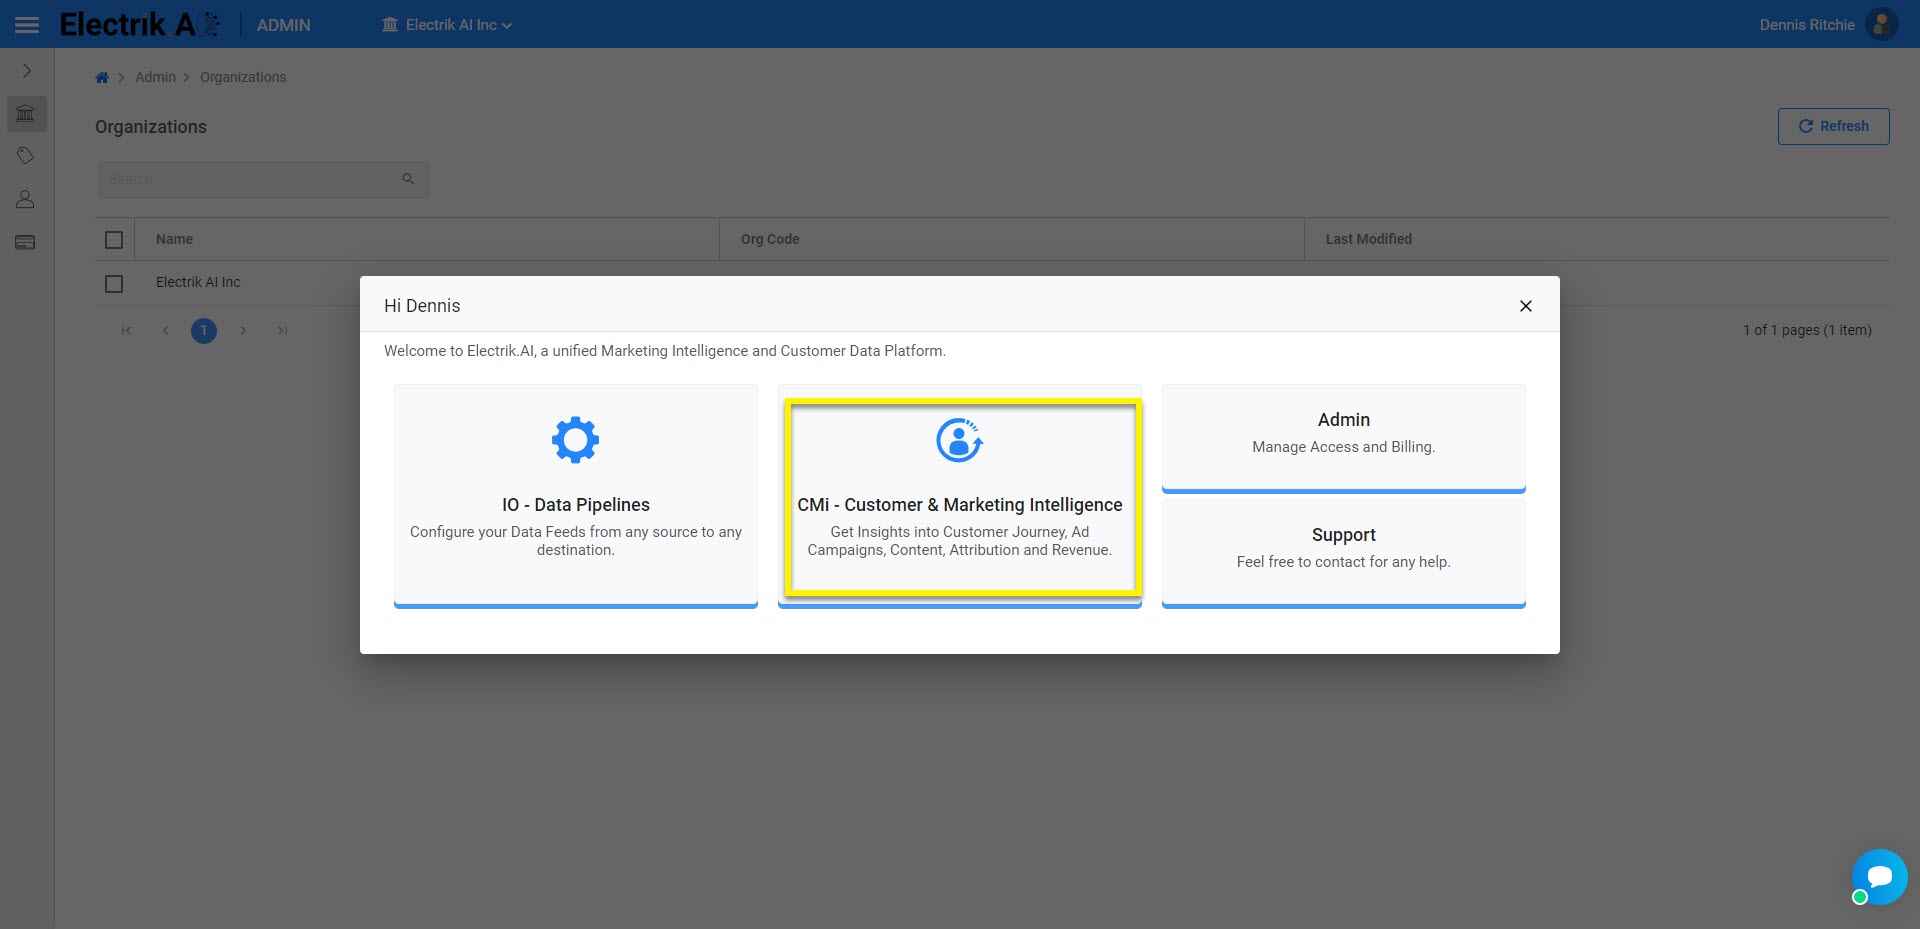
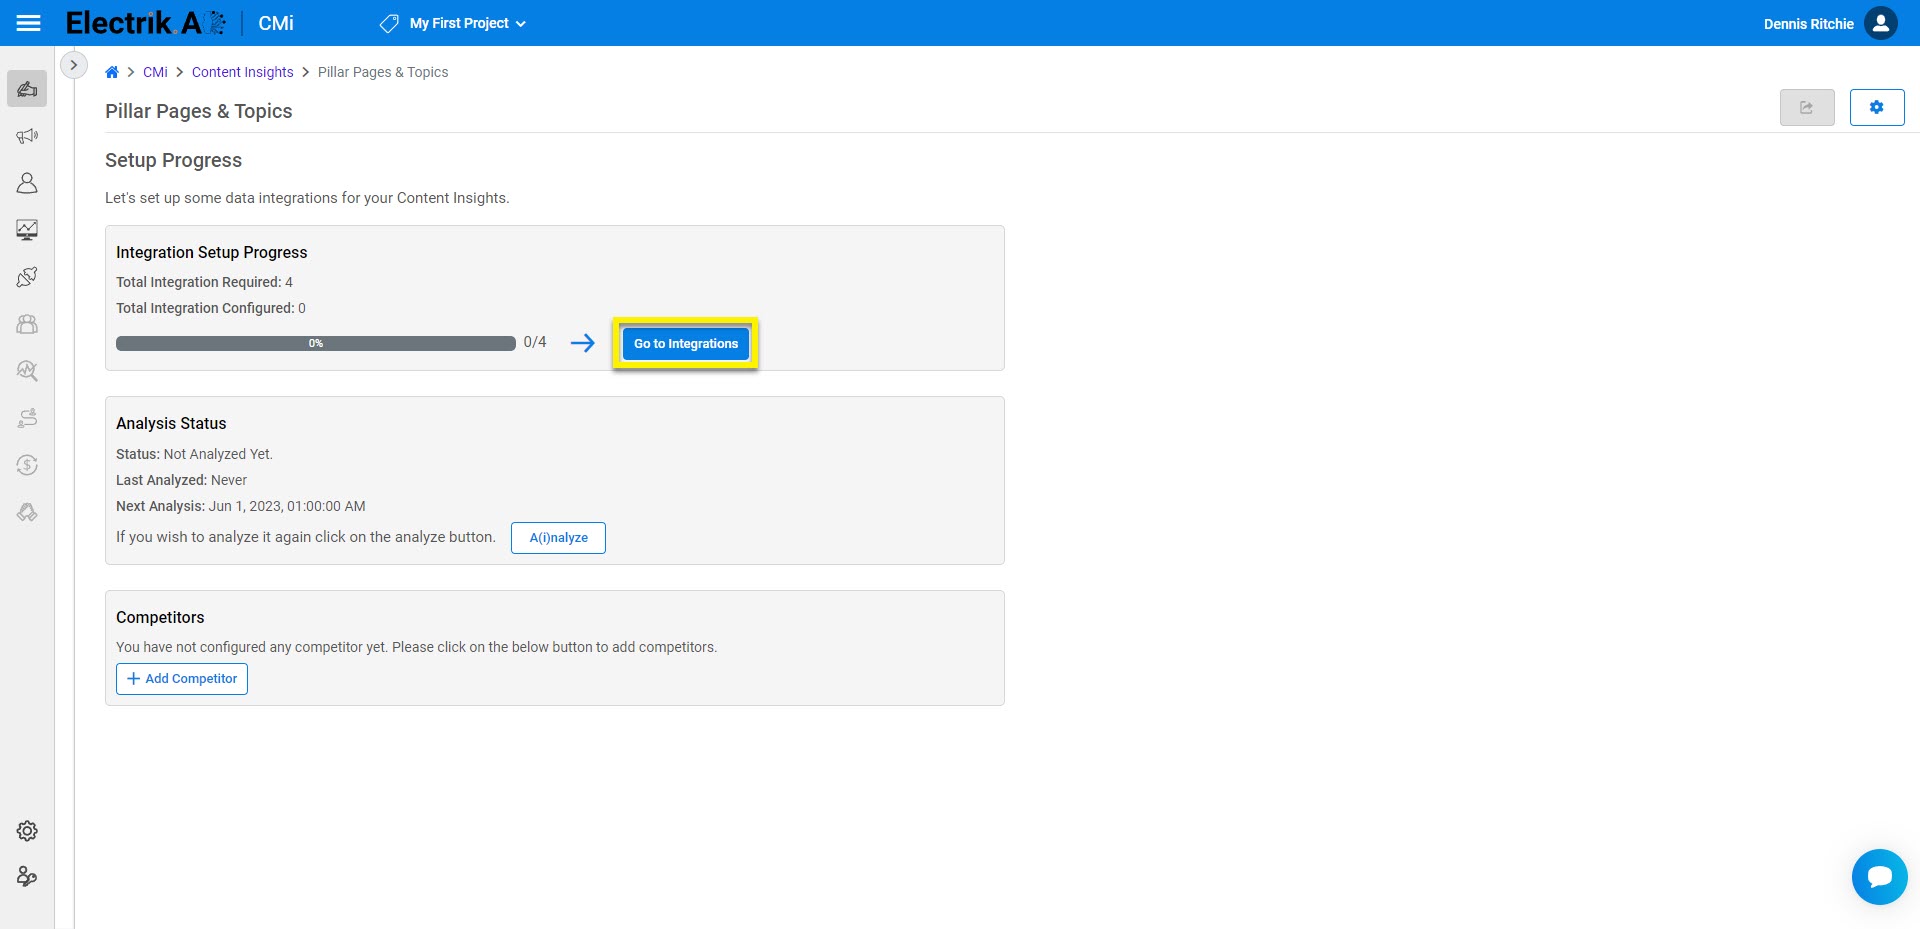
- Sign-In to Electrik.AI, On the Home Page, click on CMi.
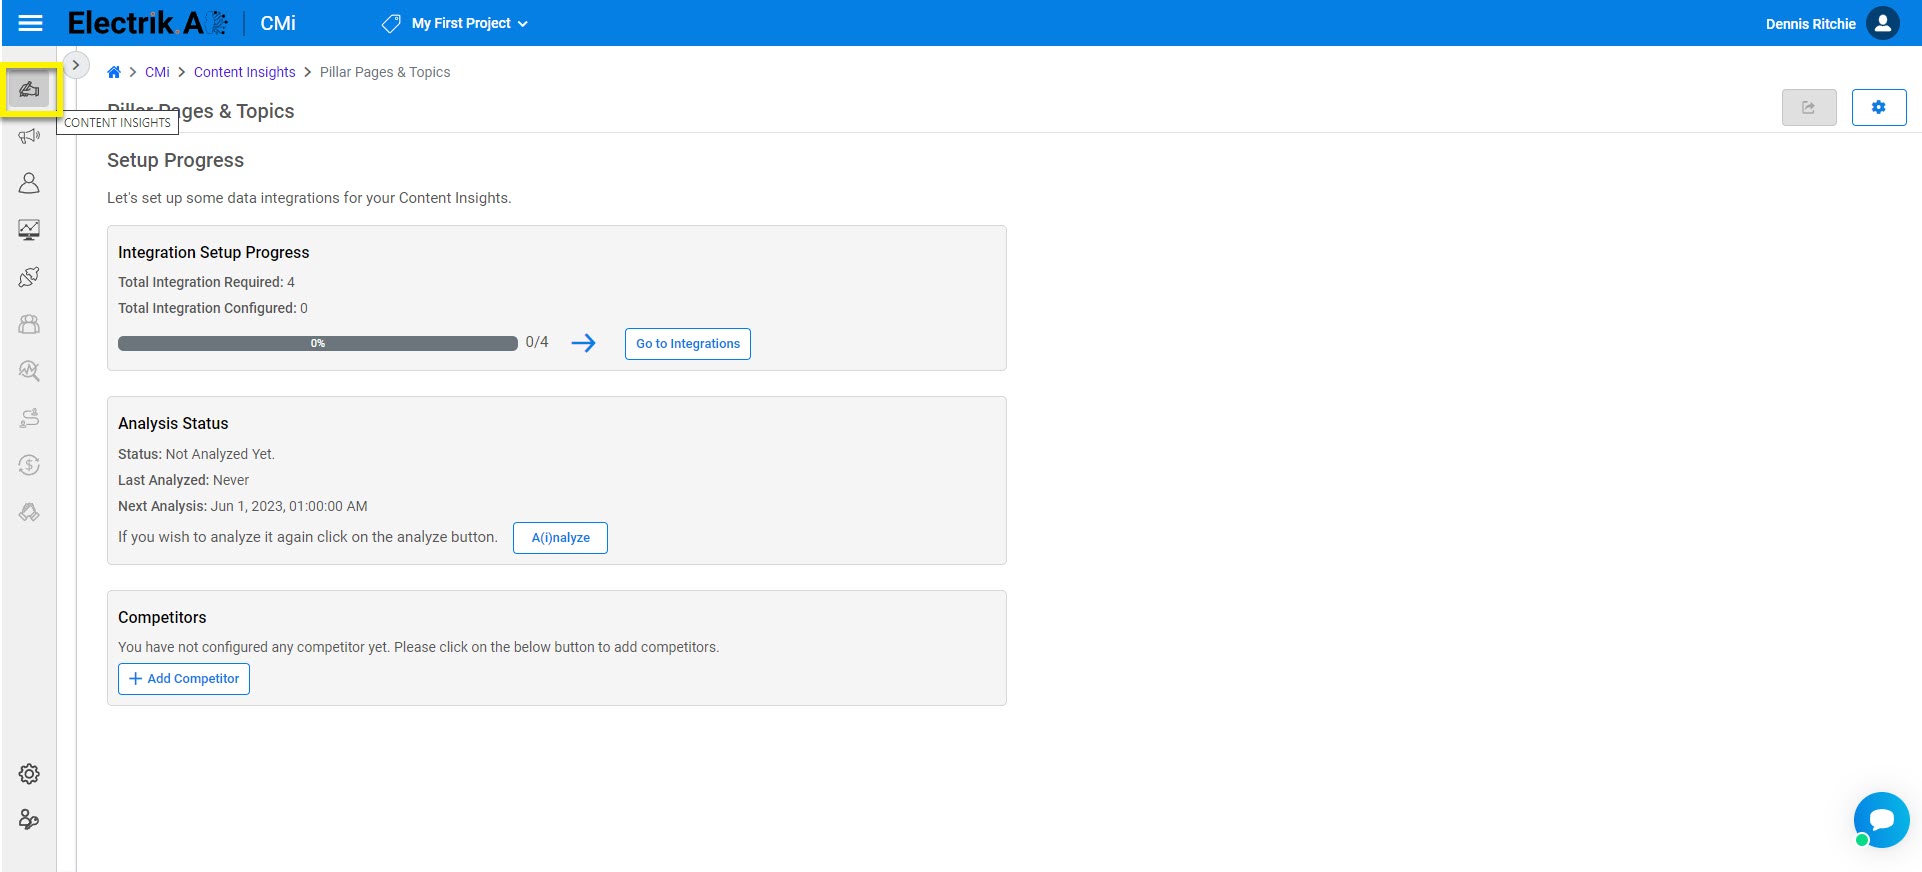
- Data integration needs to be set up only once for Content Insights, the very first time.
- Click on the Go to Integration.
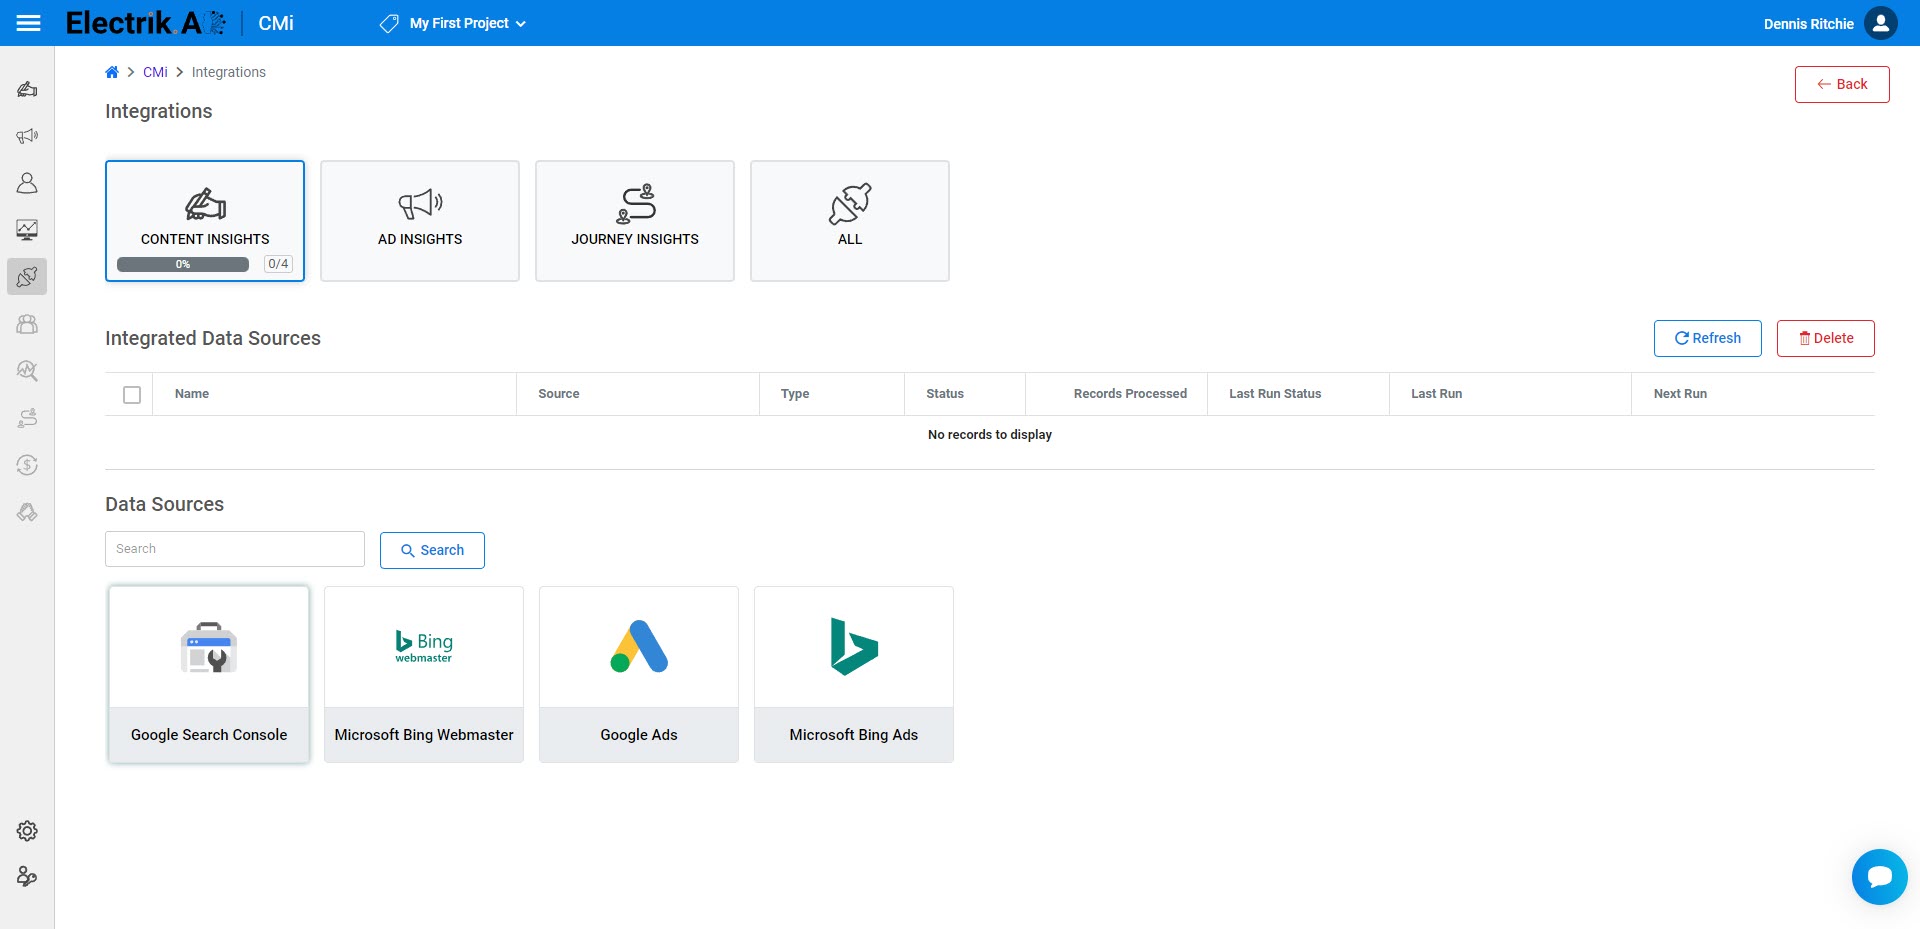
- Choose a Data Source, to generate content insights, you must set up a data source. Setting up Google Search Console integration is the minimum requirement for
generating content insights, but setting up all integrations will provide you with more diverse insights.
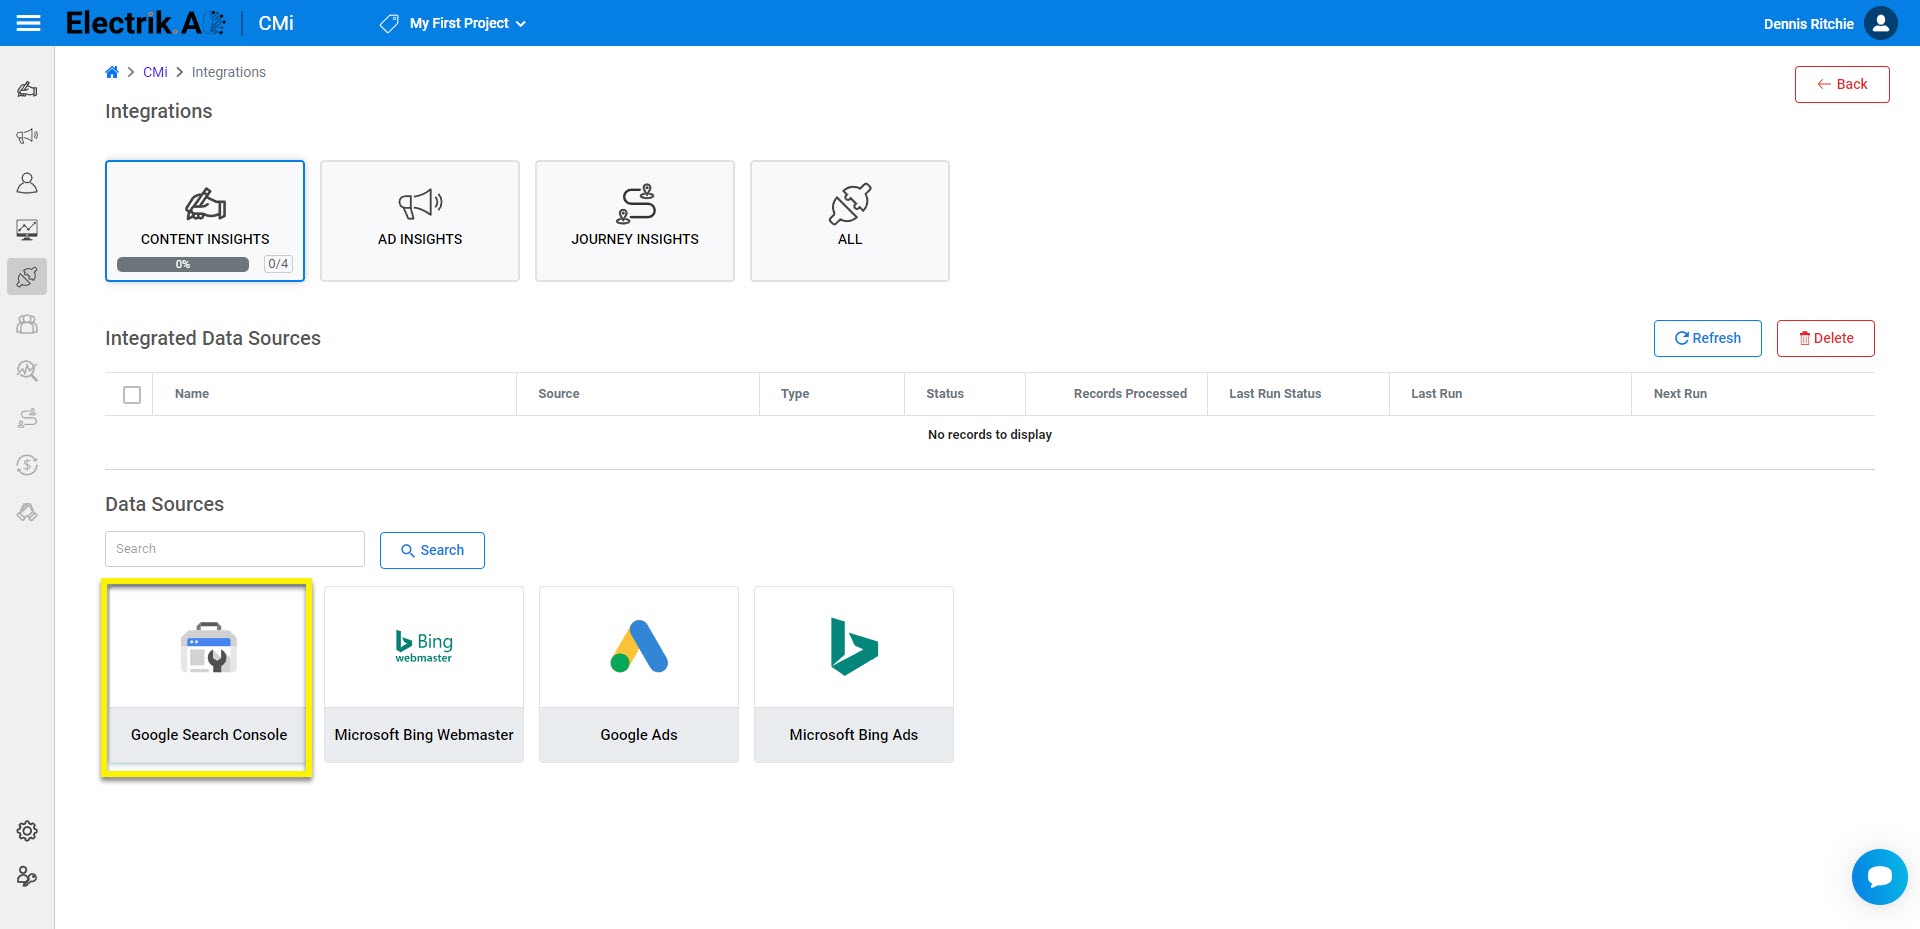
- Choose Google Search Console data source.
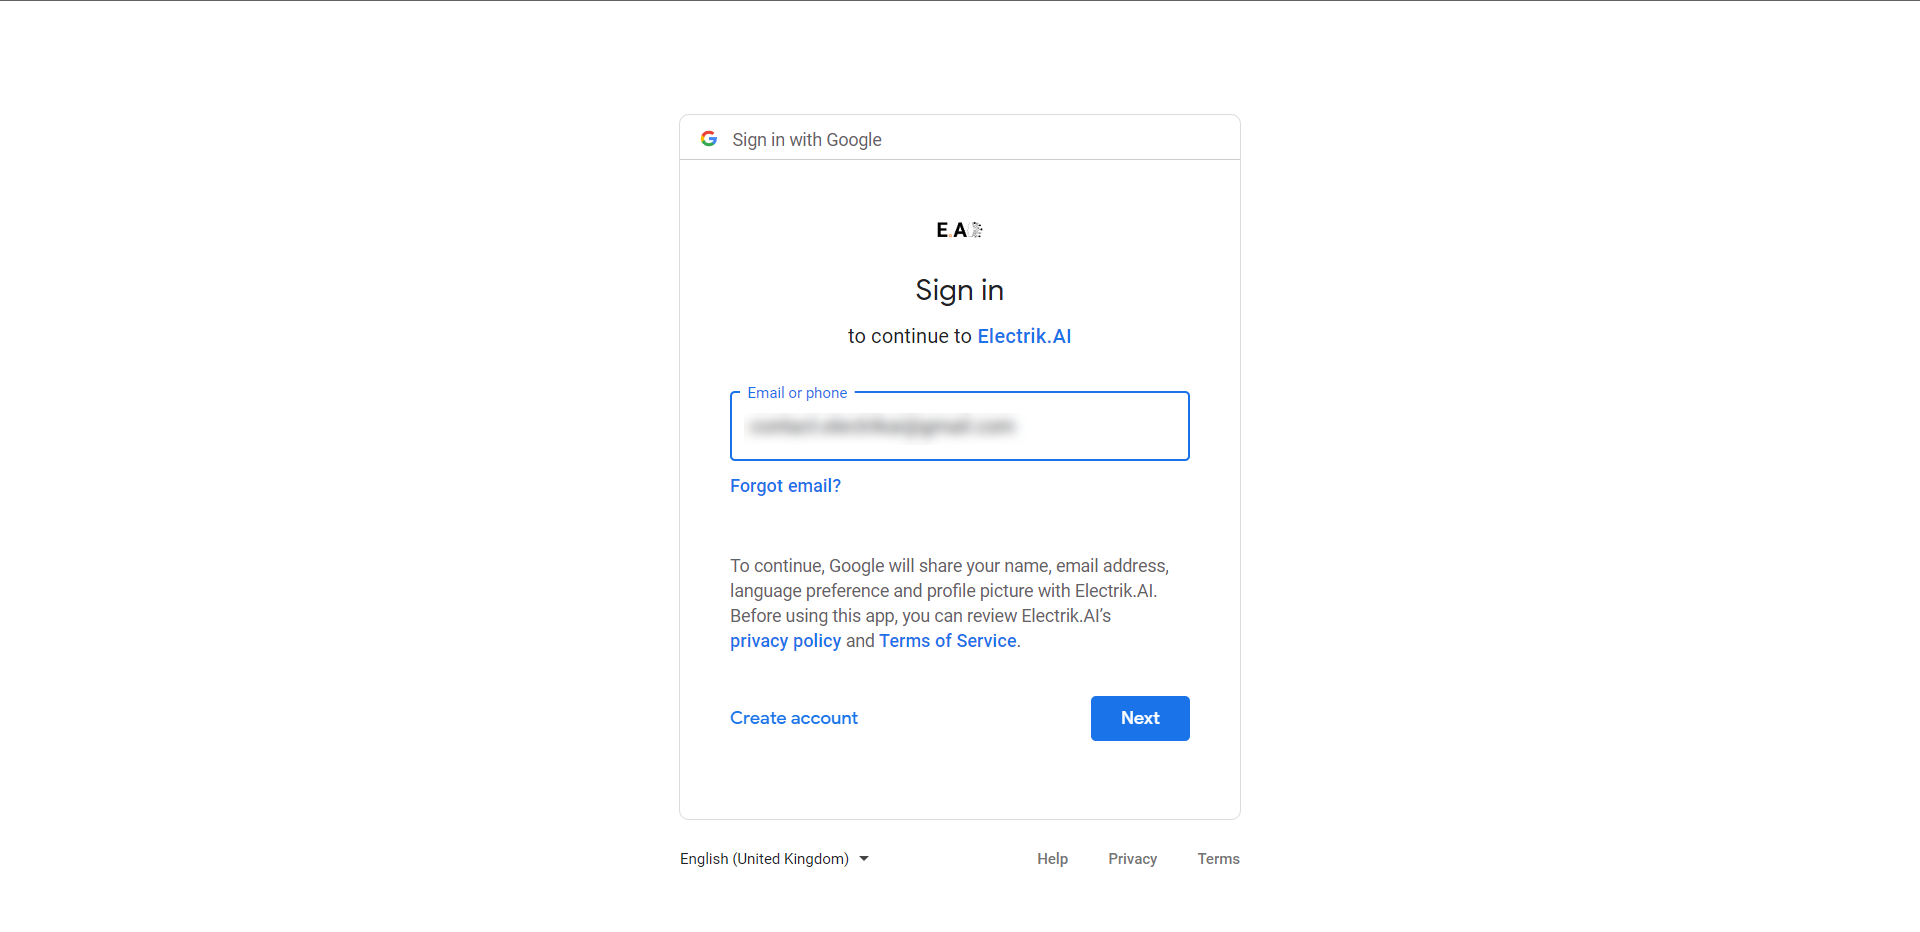
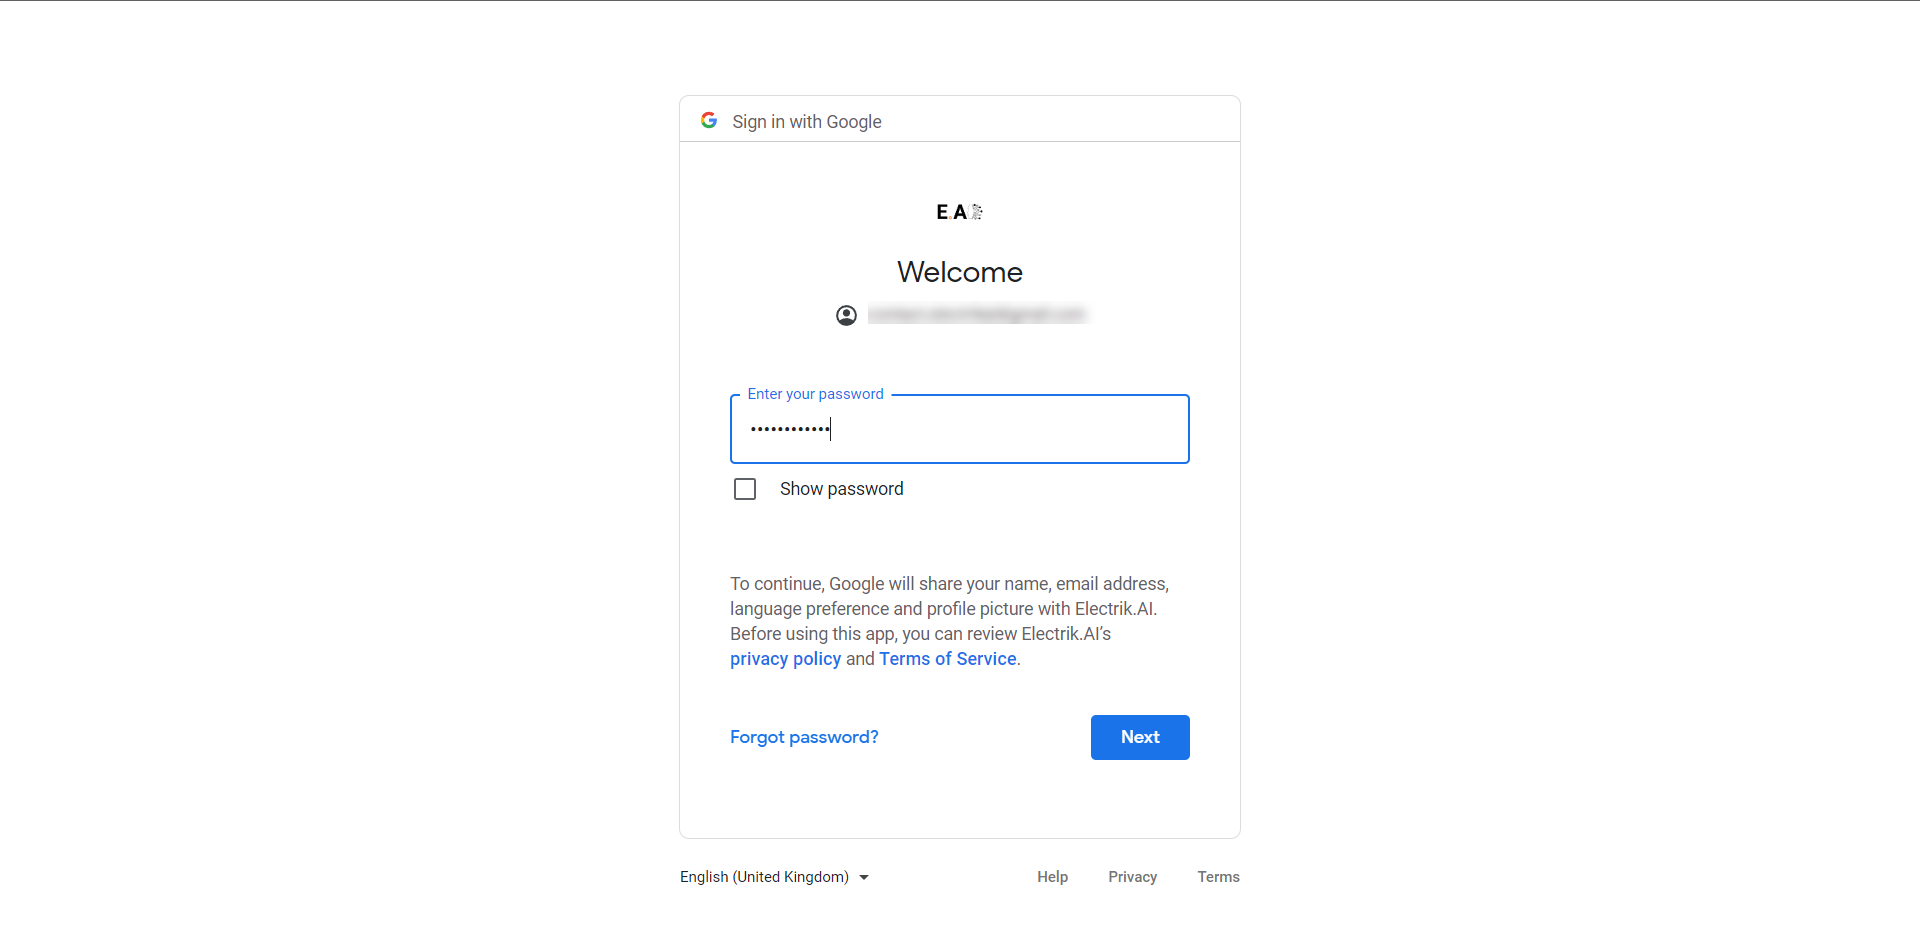
- Provide username & password.
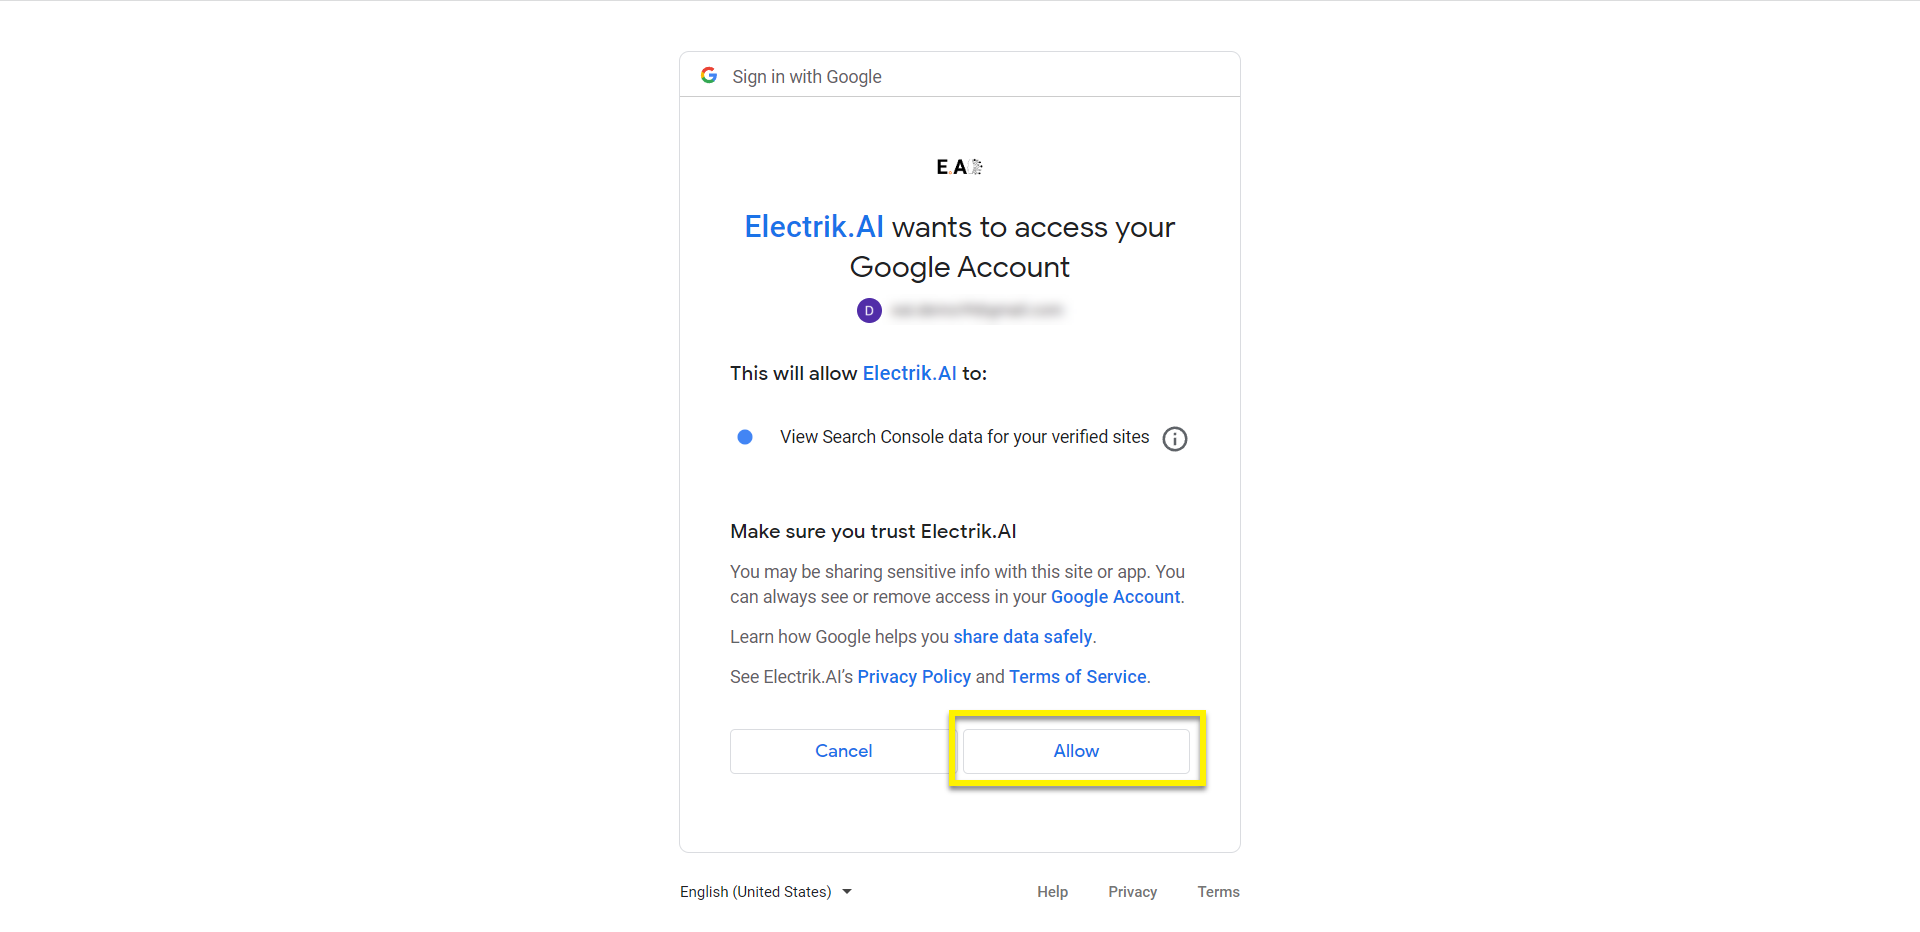
- Allow Electrik.AI to view Google Search Console Data for your verified sites.
- Choose your Site URL, for which you want to get insights.
- Click on Save & Proceed.
Congratulations, you have successfully created an Integration for Google Search Console in Electrik.AI. Please check your email for confirmation. Detailed Steps Here.
Note: Similarly, you can create data integrations for other platforms. Currently, we provide integrations for Google Ads, Microsoft Bing Ads, and Microsoft Bing Webmaster in addition to GSC.
-
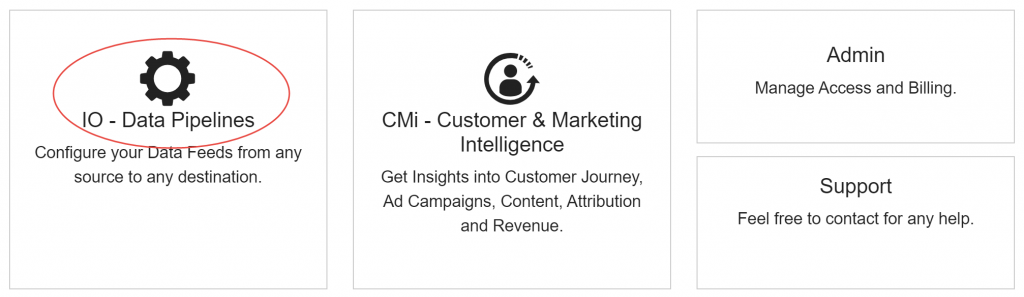
- Sign-In to Electrik.AI, On the Home Page, click on IO.
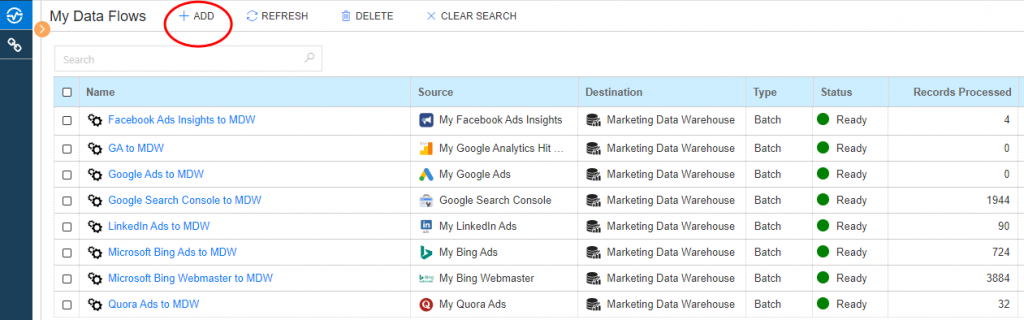
- On the Navigation bar, click Data Flows.
- Click on the ADD action button on top.
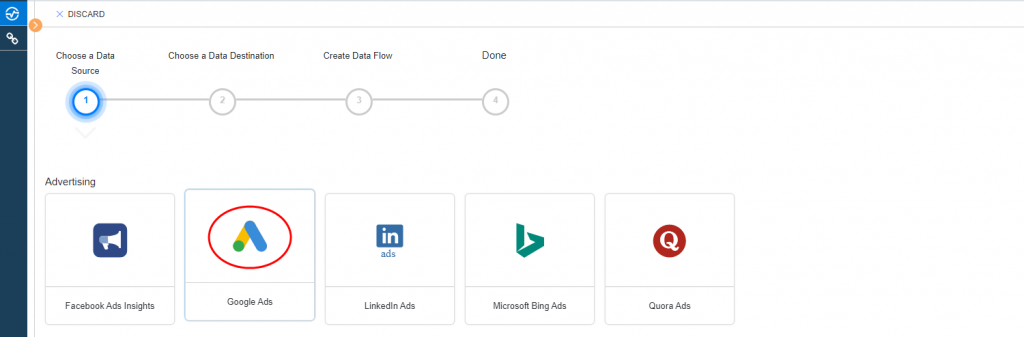
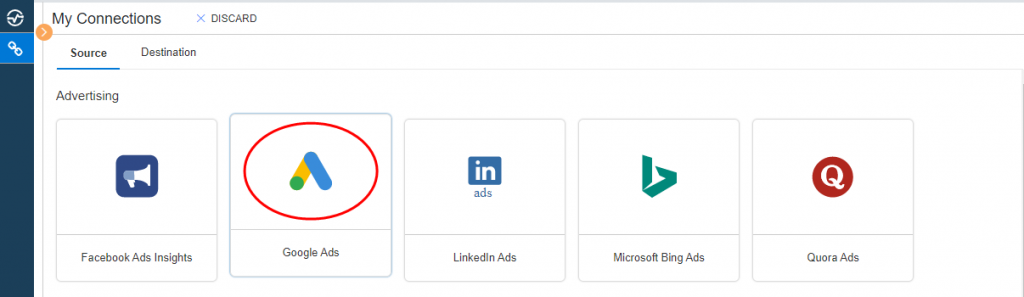
- Choose a Data Source, (let’s say) we choose Google Ads
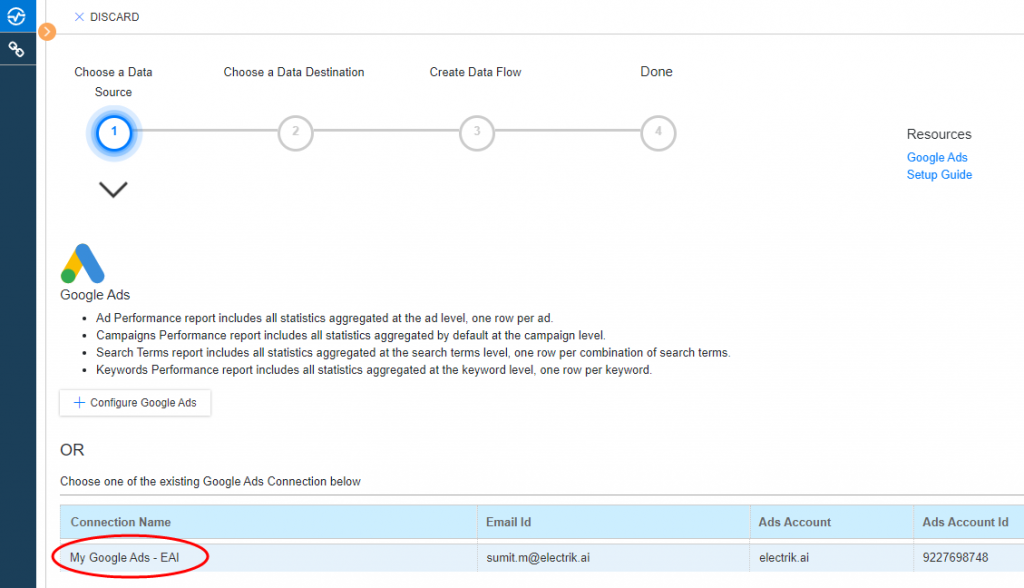
- Select your existing Google Ads connection. To Configure a new connection, refer this link.
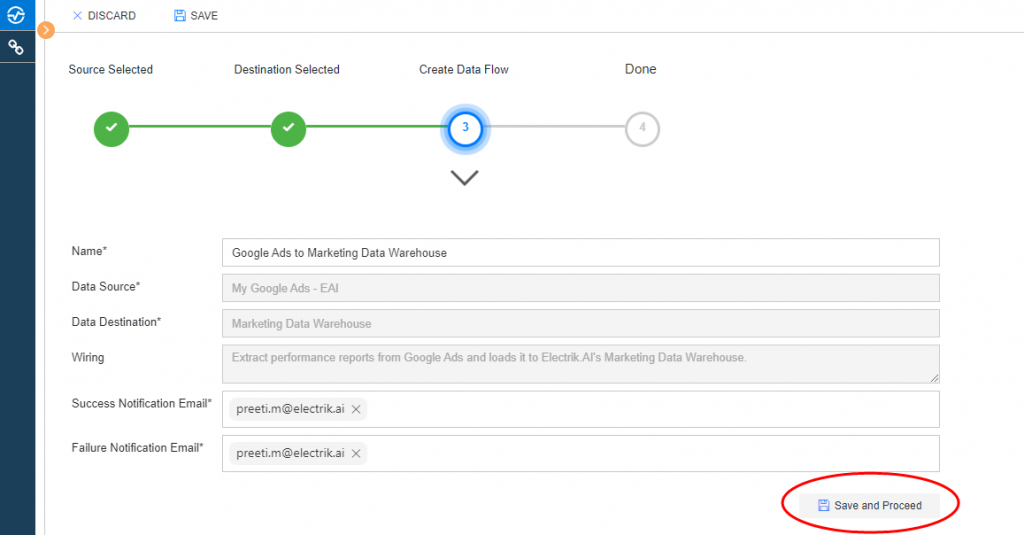
- Choose a Data Destination, Electrik.AI.
- Click on Save and Proceed.
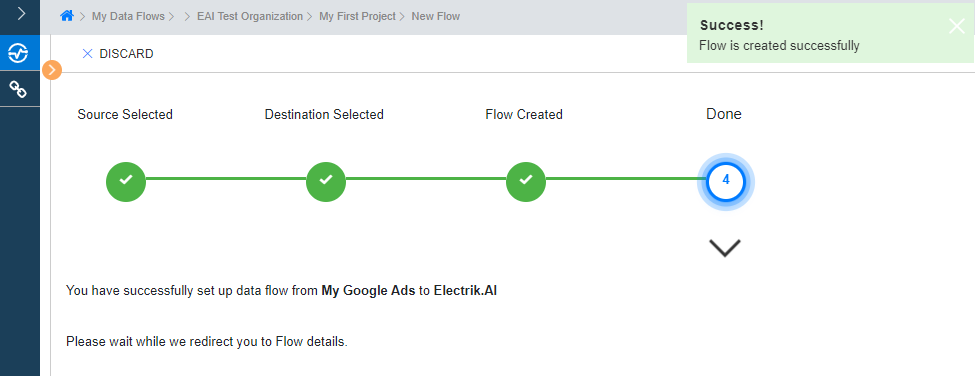
You have successfully connected ad account to CMi. Detailed Steps Here.
-
-
- Sign-In to Electrik.AI, On the Home Page, click on CMi.
- Already logged in, click on hamburger icon, and click on CMi.
- Click on Ad Insights.
- To view or export marketing intelligence for cross platform ad insights, click on Cross Platform Ad ROAS.
- To view or export marketing intelligence for cross channel ad insights, click on Cross Channel Ad ROAS.
You can see Detailed Steps Here.
Cross Platform Ad ROAS Dashboard integrates Ad performance data from multiple online advertising platform and Ad accounts to give you a holistic view of how effectively your Ad connects with your prospects.
Key Performance Indications (KPIs) highlighted in this report.
-
-
- Impressions (Impr)
The number of times the ad is served or shown online.
- Clicks
The number of times users have clicked on the ad.
- Spend (or Cost)
- Conversions (or Convr)
- Cost Per Conversion or Acquisition (CPA)
- Conversion Value (or Convr Val)
- Return on Ad Spend (ROAS)
- Click Through Rate (CTR)
- Conversion Rate (CVR)
- Cost per Click (CPC)
Step 1: Sign-In to Electrik.AI, On the Home Page, click on Admin.
Step 2: On the Navigation bar, click Projects.
Step 3: Click on the desired Project to enable CMi.
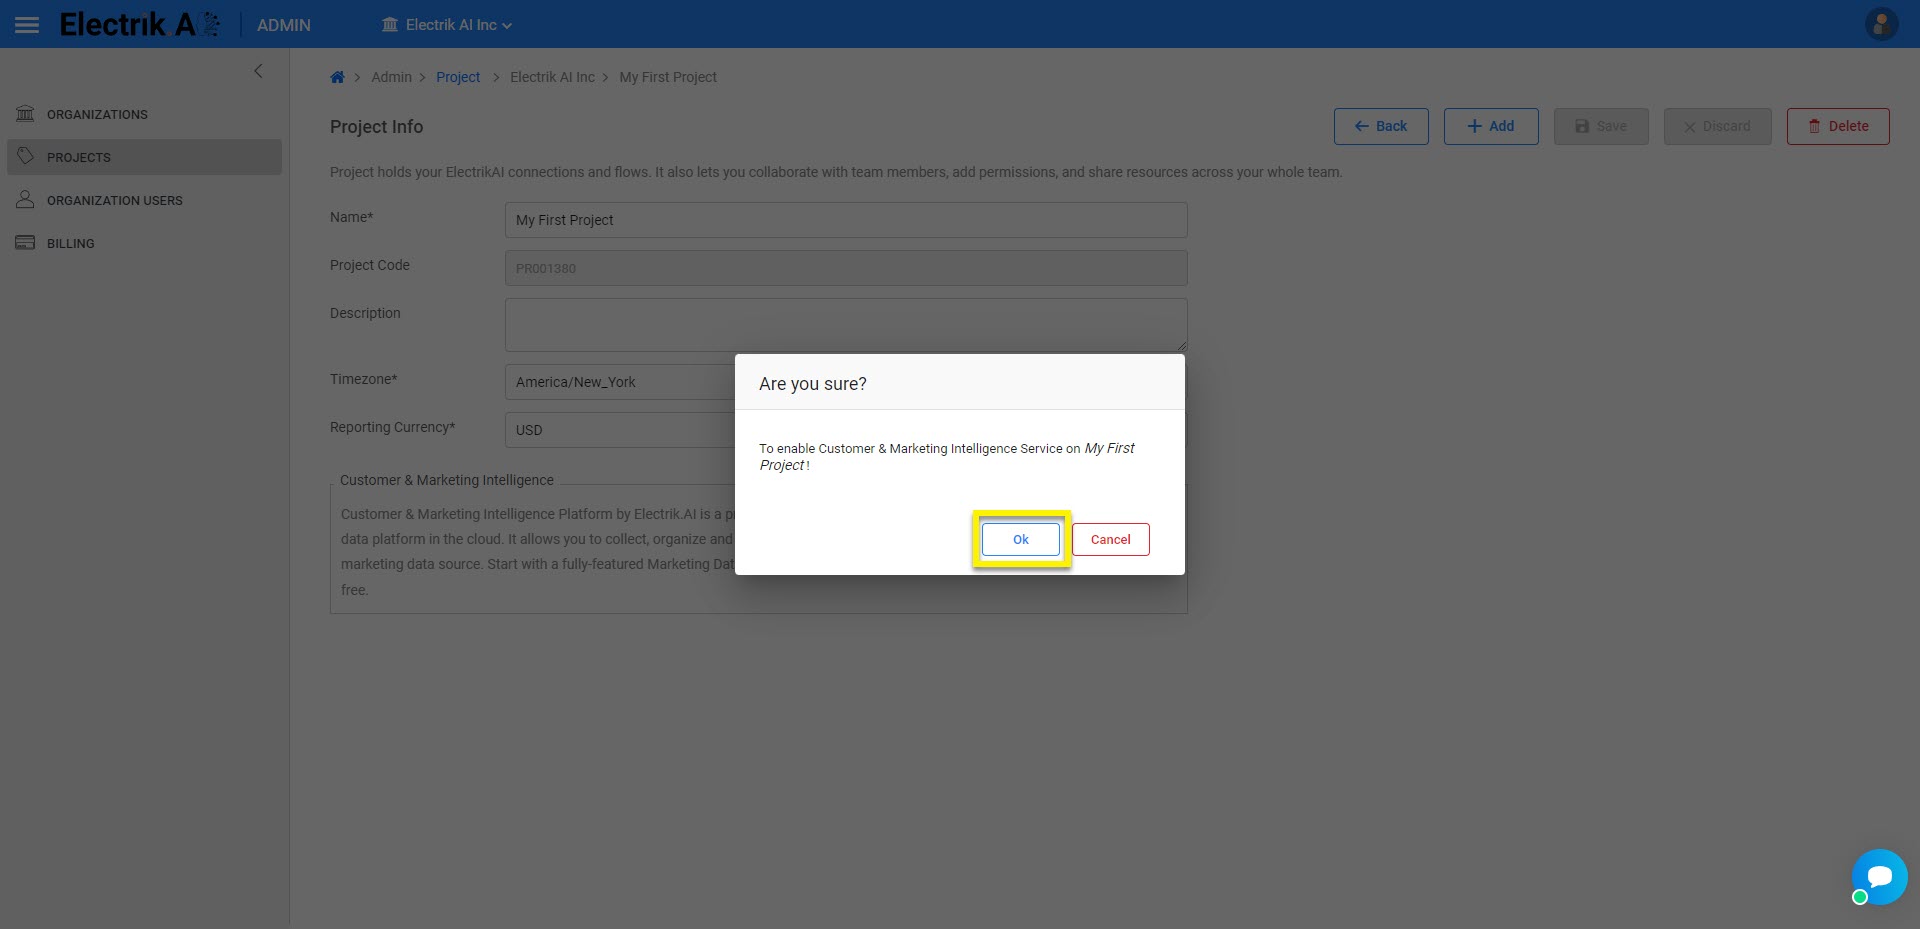
Step 4: Turn On the Customer & Marketing Intelligence by using toggle button.
Step 5: Please confirm to enable Customer & Marketing Intelligence on project, Click OK.
Step 6: You have successfully enabled Customer & Marketing Intelligence Platform Services for your project.
Step 1: Sign-In to Electrik.AI, On the Home Page, click on CMi.
Step 2: Sign-In to Electrik.AI, On the Home Page, click on CMi.
Step 3: Click on the Go to Integration.
Step 4: Choose a Data Source, to generate content insights, you must set up a data source. Setting up Google Search Console integration is the minimum requirement for generating content insights, but setting up all integrations will provide you with more diverse insights.
Step 5: Choose Google Search Console data source.
Step 6: Provide username & password.
Step 8: Choose your Site URL, for which you want to get insights.
Please note that only secure URLs (https://) will appear in the dropdown list.
Step 9: Click on Save & Proceed.
Congratulations, you have successfully created an Integration for Google Search Console in Electrik.AI. Please check your email for confirmation. Detailed Steps Here.
Note: Similarly, you can create data integrations for other platforms. Currently, we provide integrations for Google Ads, Microsoft Bing Ads, and Microsoft Bing Webmaster in addition to GSC.
You can view the execution of the data pipelines for the integrated data source
Step 1: Sign-In to Electrik.AI, On the Home Page, click on IO
Step 2: On the Navigation bar, click Data Flows.
If you’re using the compact Navigation bar, click the Data Flows icon.
If you’re using the expanded Navigation bar, click Data Flows.
Step 3: Click on the ADD action button on top.
Step 4: Choose a Data Source, (let’s say) we choose Google Ads.
Step 5: Select your existing Google Ads connection. To Configure a new connection, refer this link.
Step 6: Choose a Data Destination, Electrik.AI.
Step 7: Click on Save and Proceed.
Step 8: Flow is created successfully.
Step 1: Sign-In to Electrik.AI, On the Home Page, click on CMi.
Step 2: Click on Ad Insights.
Step 3: To view or export marketing intelligence for cross platform ad insights, click on Cross Platform ROAS.
Step 4: To view or export marketing intelligence for cross platform ad insights, click on Cross Channel ROAS.
Step 5: To view or export marketing intelligence for google ads, click on Google Ads.
Step 6: To view or export marketing intelligence for Facebook ads, click on Facebook Ads.
Step 7: To view or export marketing intelligence for LinkedIn ads, click on LinkedIn Ads.
Step 8: To view or export marketing intelligence for Quora ads, click on Quora Ads.
Step 9: To view or export marketing intelligence for Microsoft ads, click on Microsoft Bing Ads.
Follow these steps to connect your Google Ads account to Electrik.AI
Step 1: Ensure you have following prerequisites to create a Google Ads Connection in Electrik.AI
a. Google Ads Account User Id and Password.
Step 2:Signup for your Electrik.AI account.
Step 3:Sign-In to Electrik.AI, On the Home Page, click on IO.
Step 4: On the Navigation bar, click Connections.
If you’re using the compact Navigation bar, click the Connections icon.
If you’re using the expanded Navigation bar, click Connection.
Step 5: Click on the ADD action button on top.
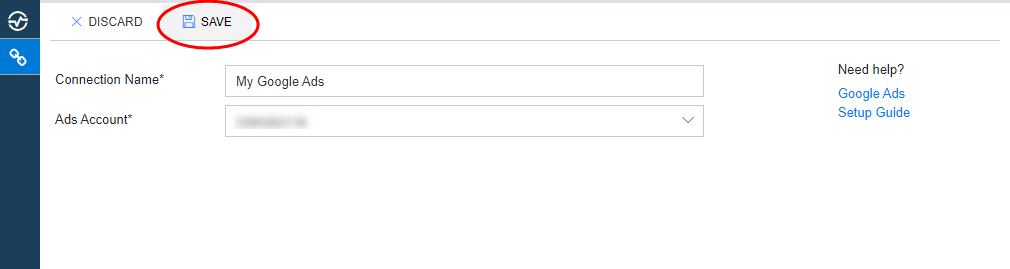
Step 6: Choose a Data Source, choose Google Ads connection.
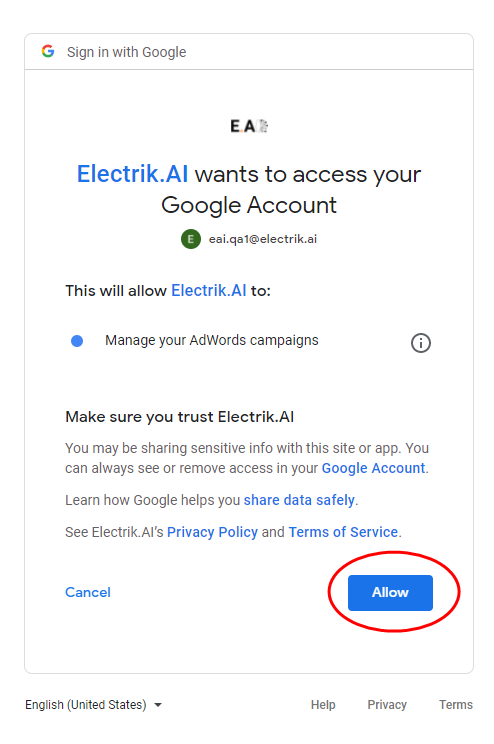
Step 7: Enter your Google Ads User Id and Password.
Step 8: Allow Electrik.AI to access your Google Ads account.
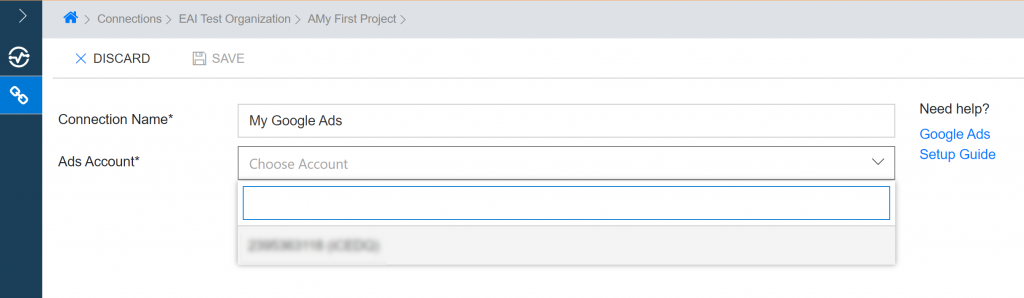
Step 9: Choose your Google Ads Account for which you want to extract data.
Step 10: Click on Save action button on the top.
Step 11: Congratulations, you have successfully created a Google Ads Connection in Electrik.AI.