
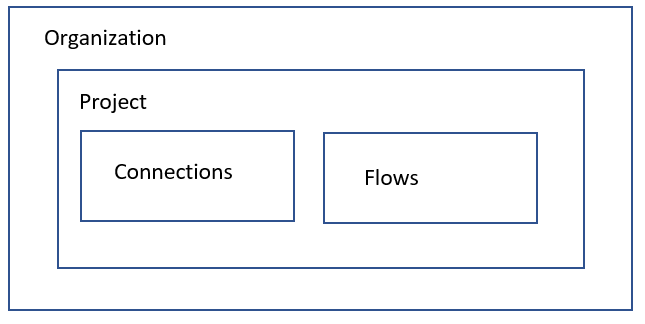
Organization is the root node in the Electrik.AI hierarchy. An organization gets automatically created when the user sign up on the website along with his Billing Profile.
Docs
- AdRoll Data Export
- Adobe Analytics Data Export
- Bing Webmaster Data Export
- Criteo Ads Data Export
- Facebook Ads Data Export
- Facebook Page Insights Data Export
- Freshdesk Data Export
- Freshsales CRM Data Export
- Freshsales Suite (Freshworks) Data Export
- Google Ads Data Export
- Google Analytics Hit Data Extractor
- Google Analytics Historical Data Extractor
- Google Analytics Custom Report Extractor
- Google Analytics 4 Custom Report Extractor
- Google Analytics 4 Extractor
- Google Analytics 4 BigQuery (Service Account) Extractor
- Google Ads Keyword Ideas (Planner) Extractor
- Google Search Console Data Export
- HubSpot Data Export
- Jira Data Export
- LinkedIn Ads Data Export
- LinkedIn Page Analytics Data Export
- Microsoft Ads Data Export
- Microsoft Ads Keyword Planner Extractor
- Pinterest Data Export
- Pinterest Public Data Export
- Reddit Public Data Export
- Quora Ads Data Export
- SendGrid Data Export
- Shopify Data Export
- Stripe Data Export
- Taboola Data Export
- Twitter Ads Data Export
- Vimeo Public Data Export
- YouTube Analytics Data Export
Admin - Manage Access and Billing
What is Organization?
How to access or update Organization?
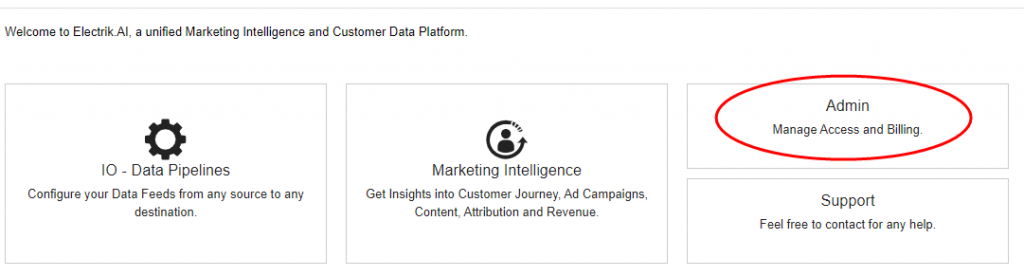
Step 1: Sign-In to Electrik.AI, On the Home Page, click on Admin.
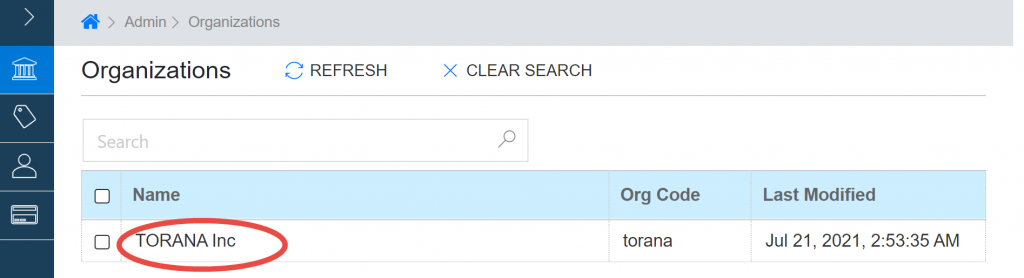
Step 2: On the Navigation bar, click Organization.
Step 3: Click on your Organization.
Step 4: Update Organization details such as Address, City, State, Country, Email, Phone etc. Click on the Save action button on top.
You have successfully updated Organization details. Detailed Steps Here.
Manage Billing
What is Billing Profile?
Billing profile for an organization is created when a user sign up their organization on Electrik.AI website. It is used to define who pays for services used by the organization. You can add a payment method to your billing account at any time.
How to access & update Billing Profile?
Step 1: Sign-In to Electrik.AI, On the Home Page, click on Admin.
Step 2: On the Navigation bar, click Billing.
Step 3: Update Billing details. Click on the Save action button on top.
You have successfully updated Billing details. Detailed Steps Here.
How to add Payment Method?
Step 1: Sign-In to Electrik.AI, On the Home Page, click on Admin.
Step 2: On the Navigation bar, click Billing.
Step 3: Select “Billing” icon in the right panel and Click “Add Payment Method” present at the bottom.
Step 4: You will be redirected to a secured stripe payment gateway. Enter your card information and hit save card. By saving your card information you allow Electrik.AI to charge your card for future payments.
You have successfully added Billing details. Detailed Steps Here.
Manage Projects
What are Projects?
Project is a logical partition in an organization. Each Electrik.AI user has access to at least one project, either one they created themselves, or one that they were given access to by someone else.
Projects let you collaborate with team members, add permissions, and share resources across your whole team. Projects form the basis for creating, enabling, and using all Electrik.AI services including managing connections, flow, enabling billing, and managing permissions for users.
Projects can also be used to manage marketing campaigns as Electrik.AI ensures project information is present in data extracted from all data source in a project. Making it easier to connect data from different marketing channels used in a marketing campaign.
How to add Project?
Step 1: Sign-In to Electrik.AI, On the Home Page, click on Admin.
Step 2: On the Navigation bar, click Projects.
Step 3: Click on the ADD action button on top.
Step 4: Enter a Name, Description and Time zone & currency for your Project. Click on the Save action button on top.
You have successfully created a new Project. Detailed Steps Here.
Note: Time zone entered at project level is used as the day boundary for your flows, regardless of where the data originates. For data accuracy please ensure this is same as the Time zone of your Google Analytics View.
How to update Project?
Step 1: Sign in to your Electrik.AI, On the Home Page, click on Admin.
Step 2: On the Navigation bar, click Projects.
Step 3: Select the project you wish to update
Step 4: Update the desired fields. Click on the Save action button on top.
You have successfully updated Project details. Detailed Steps Here.
How to delete Project?
Step 1: Sign in to your Electrik.AI, On the Home Page, click on Admin.
Step 2: On the Navigation bar, click Projects.
Step 3: Select the project you wish to delete
Step 4: Click on Delete action button on top.
You have successfully deleted Project. Detailed Steps Here.
Illustration Steps
How to access or update Organization?
Step 1: Sign-In to Electrik.AI, On the Home Page, click on Admin.
Step 2: On the Navigation bar, click Organization.

Step 3: Click on your Organization.
Step 4: Update Organization details such as Address, City, State, Country, Email, Phone etc. Click on the Save action button on top.
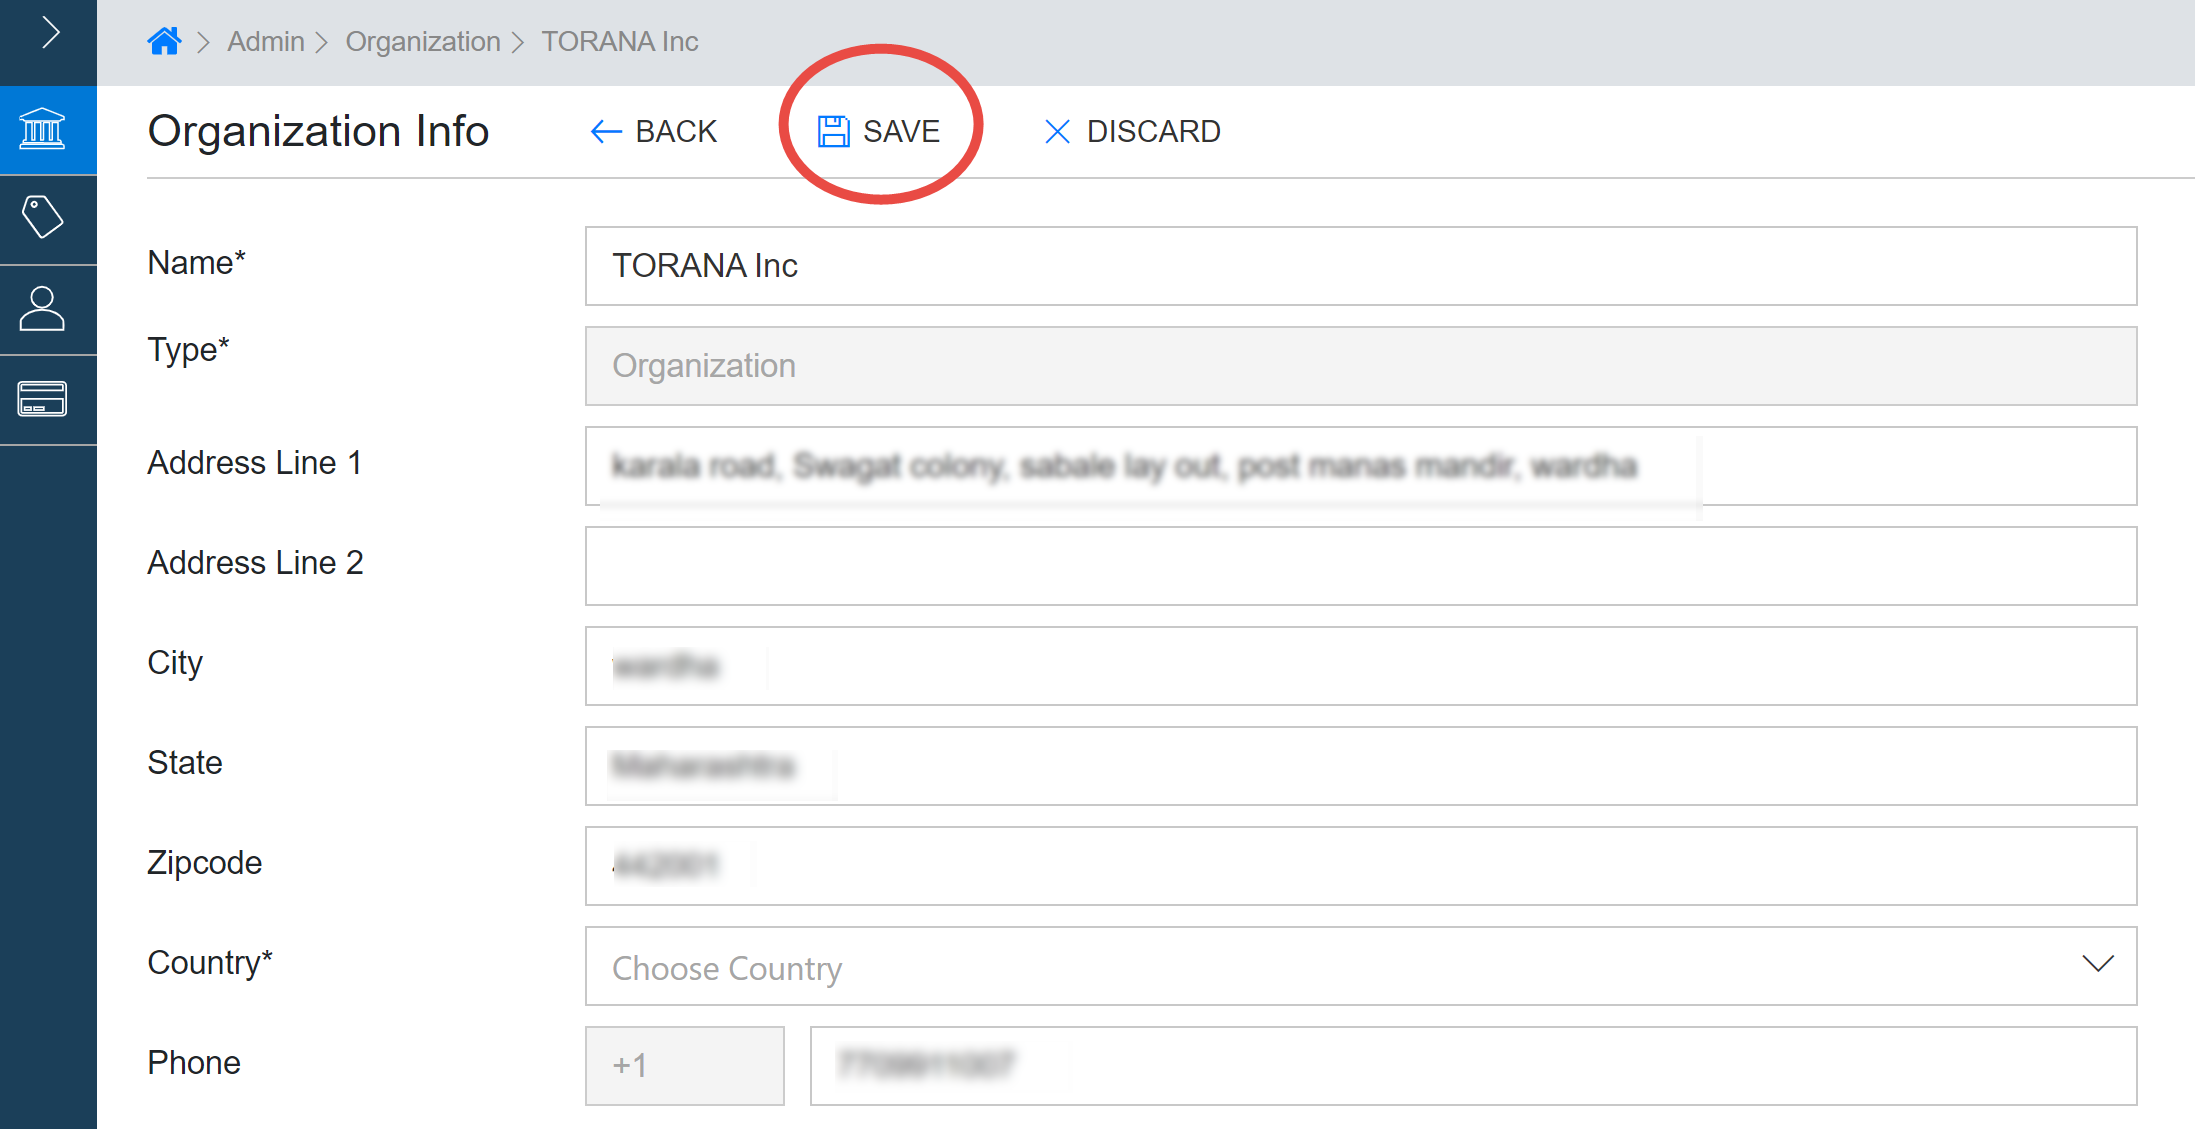
You have successfully updated Organization details.
How to access & update Billing Profile?
Step 1: Sign-In to Electrik.AI, On the Home Page, click on Admin.
Step 2: On the Navigation bar, click Billing.

Step 3: Update Billing details. Click on the Save action button on top.

You have successfully updated Billing details.
How to add Payment Method?
Step 1: Sign-In to Electrik.AI, On the Home Page, click on Admin.
Step 2: On the Navigation bar, click Billing.
Step 3: Select “Billing” icon in the right panel and Click “Add Payment Method” present at the bottom.
Step 4: You will be redirected to a secured stripe payment gateway. Enter your card information and hit save card. By saving your card information you allow Electrik.AI to charge your card for future payments.
You have successfully added Billing details.
How to add Project?
Step 1: Sign-In to Electrik.AI, On the Home Page, click on Admin.
Step 2: On the Navigation bar, click Projects.

Step 3: Click on the ADD action button on top.

Step 4: Enter a Name, Description and Time zone & currency for your Project. Click on the Save action button on top.

You have successfully created a new Project. Detailed Steps Here.
Note: Time zone entered at project level is used as the day boundary for your flows, regardless of where the data originates. For data accuracy please ensure this is same as the Time zone of your Google Analytics View.
How to update Project?
Step 1: Sign in to your Electrik.AI, On the Home Page, click on Admin.
Step 2: On the Navigation bar, click Projects.
Step 3: Select the project you wish to update; In this example we will select “Google Analytics”.

Step 4: Update the desired fields. Click on the Save action button on top.

You have successfully updated Project details.
How to delete Project?
Step 1: Sign in to your Electrik.AI, On the Home Page, click on Admin.
Step 2: On the Navigation bar, click Projects.
Step 3: Select the project you wish to delete; In this example we will delete “Google Analytics”.
Step 4: Click on Delete action button on top.
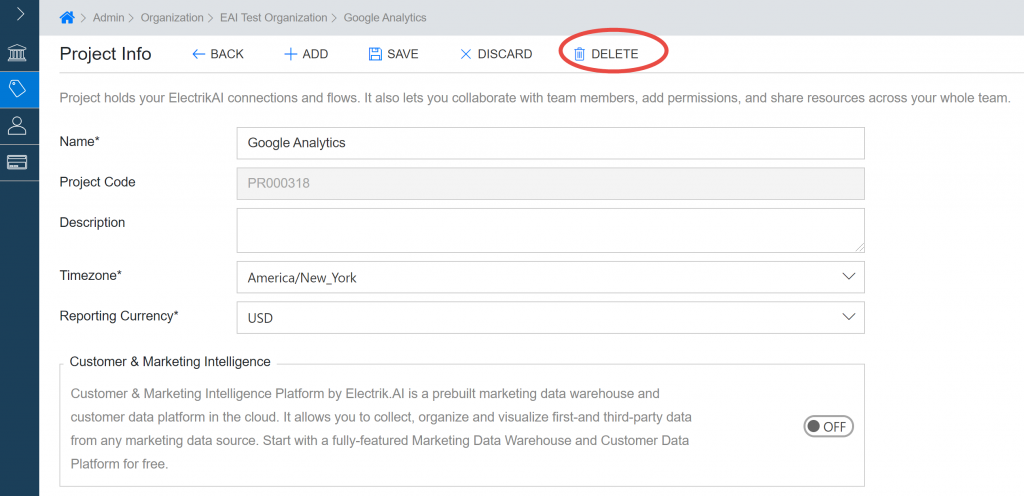
You have successfully deleted Project.
How to add Payment Method?
Step 1: Sign-In to Electrik.AI, On the Home Page, click on Admin.
Step 2: On the Navigation bar, click Billing.
Step 3: Select “Billing” icon in the right panel and Click “Add Payment Method” present at the bottom.
Step 4: You will be redirected to a secured stripe payment gateway. Enter your card information and hit save card. By saving your card information you allow Electrik.AI to charge your card for future payments.
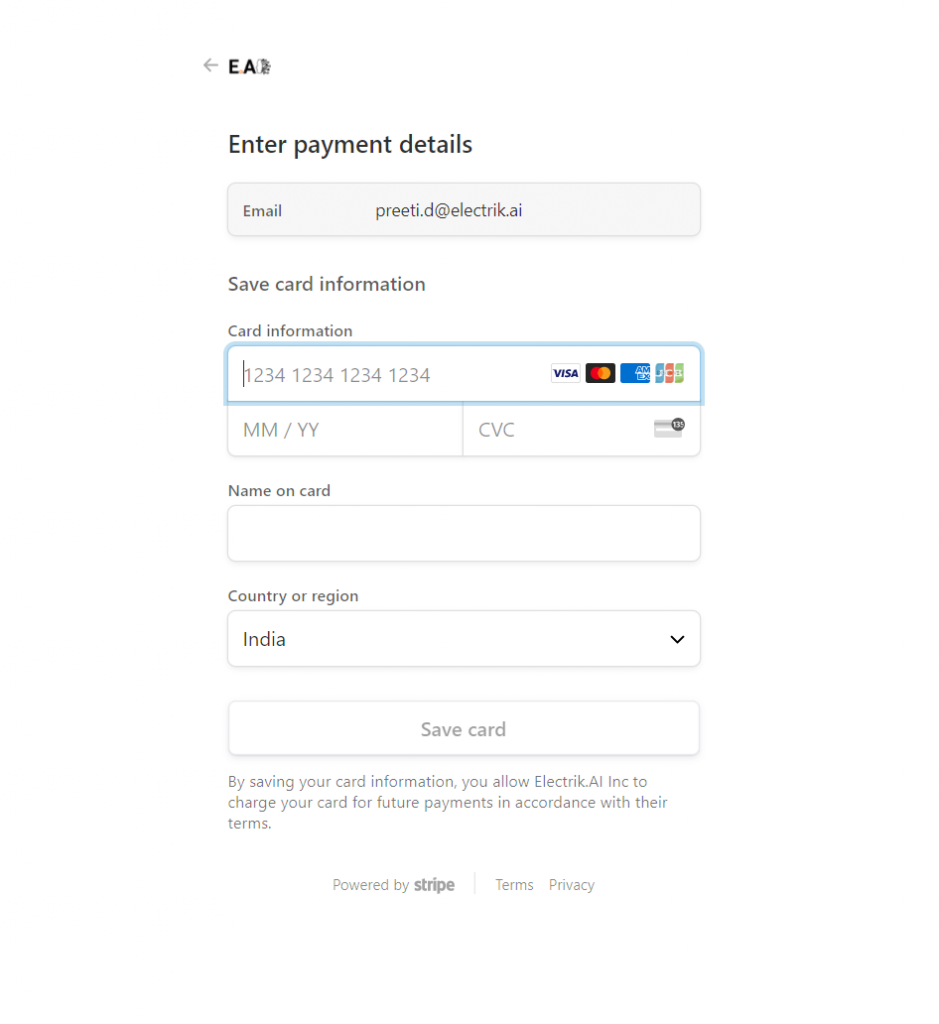
You have successfully added Billing details.