

Shopify is a subscription-based ecommerce platform that lets you set up an online store and sell your products. You can build a Shopify store or sell using an existing website. You can sell through social media, blog posts, emails and Shopify merchants can also sell their products in person with Shopify POS (point of sale).
Docs
- AdRoll Data Export
- Adobe Analytics Data Export
- Bing Webmaster Data Export
- Criteo Ads Data Export
- Facebook Ads Data Export
- Facebook Page Insights Data Export
- Freshdesk Data Export
- Freshsales CRM Data Export
- Freshsales Suite (Freshworks) Data Export
- Google Ads Data Export
- Google Analytics Hit Data Extractor
- Google Analytics Historical Data Extractor
- Google Analytics Custom Report Extractor
- Google Analytics 4 Custom Report Extractor
- Google Analytics 4 Extractor
- Google Analytics 4 BigQuery (Service Account) Extractor
- Google Ads Keyword Ideas (Planner) Extractor
- Google Search Console Data Export
- HubSpot Data Export
- Jira Data Export
- LinkedIn Ads Data Export
- LinkedIn Page Analytics Data Export
- Microsoft Ads Data Export
- Microsoft Ads Keyword Planner Extractor
- Pinterest Data Export
- Pinterest Public Data Export
- Reddit Public Data Export
- Quora Ads Data Export
- SendGrid Data Export
- Shopify Data Export
- Stripe Data Export
- Taboola Data Export
- Twitter Ads Data Export
- Vimeo Public Data Export
- YouTube Analytics Data Export
Shopify Data Export
What is Shopify?
How to add Shopify Source in Electrik.AI?
Follow these steps to connect your Shopify account to Electrik.AI
Step 1: Ensure you have following prerequisites to create a Shopify Connection in Electrik.AI
a. Access to Shopify account.
b. Shop Domain Name.
Step 2: Sign-in into your Electrik.AI account
Step 3:Select IO in Electrik.AI dashboard.

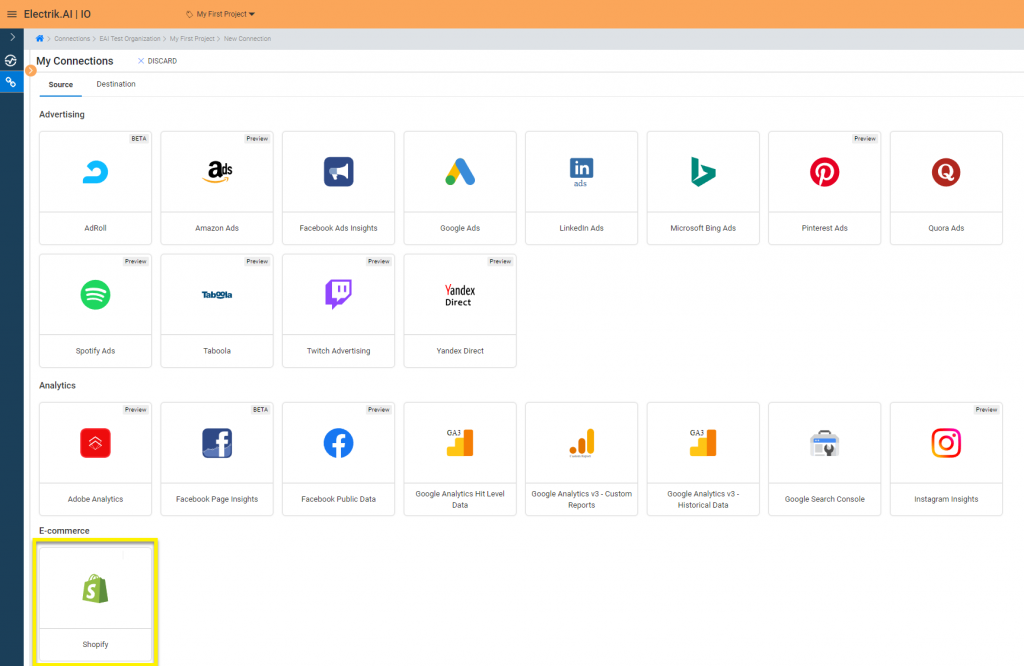
Step 4: Select the Connections tab in the left most navigation bar & click on “Add” action button.

Step 5: The Source default tab is selected just click on “Shopify” connection.
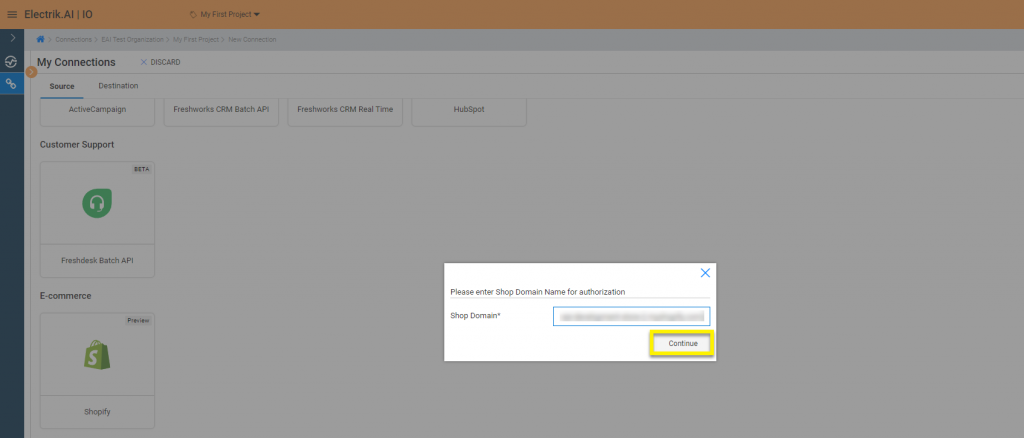
Step 6: Provide your Shop Domain Name for authorization.
Step 7: Login to your Shopify Store.

Step 8: Allow Electrik.AI to access your Shopify account.

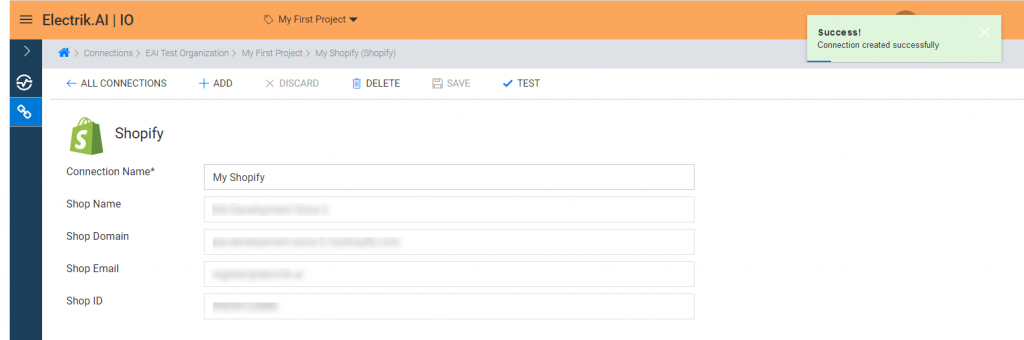
Step 9: Click on Save button on the top.

Congratulations, you have successfully created a Shopify Connection in Electrik.AI
What are the supported Data Destinations?
Electrik.AI supports the following destinations to export Shopify Data.


How to export Shopify ?
Electrik.AI creates a data flow (or ETL process) that exports Shopify to a target database or data warehouse. This process runs daily at scheduled time and exports data for the previous day.
Follow these steps to create a Data Flow from Shopify to Database/Data Warehouse
Step 1: Ensure you have the following prerequisites.
1. Access to Shopify Account.
2. Access to a Database/Warehouse of your choice (PostgreSQL, MySQL, Azure SQL, BigQuery.)
3. Database Connection Details such as Host, Port, DB Name, DB User, DB Password
Step 2: Sign-in into your Electrik.AI account.
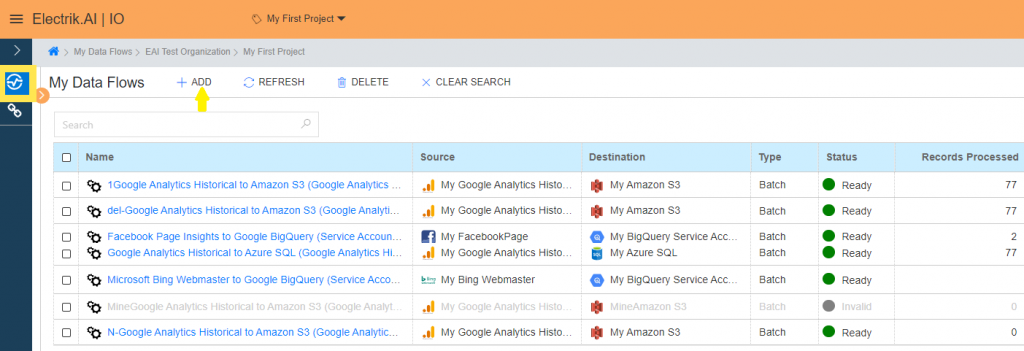
Step 3: Select IO in Electrik.AI dashboard
Step 4: Click on Add button to create a Shopify Flow
Step 5: Select Shopify Connection present in the list of available sources.
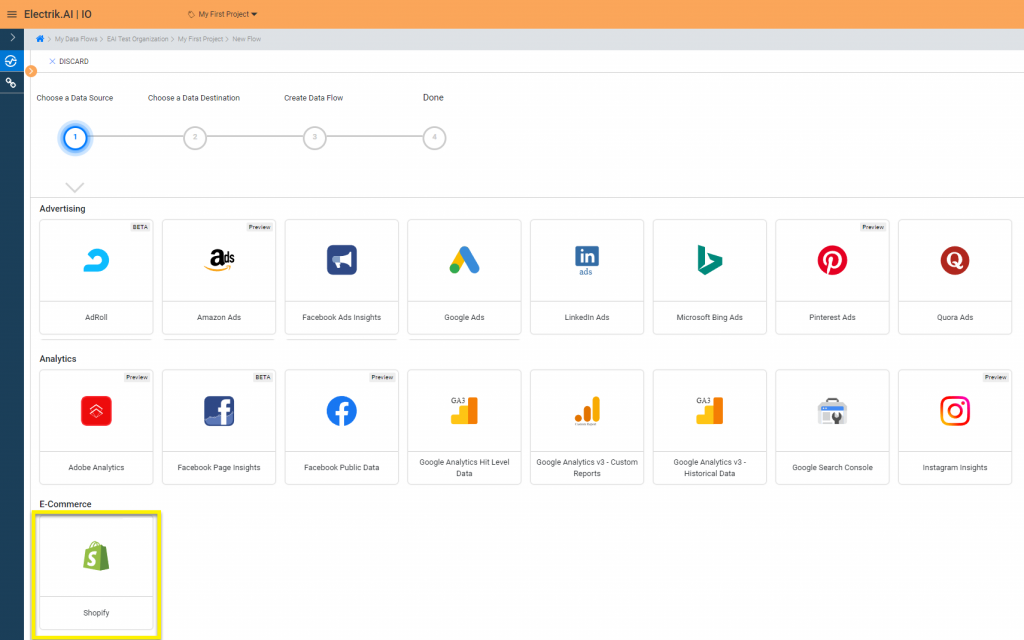
Step 6: Select your existing Shopify connection in Electrik.AI.
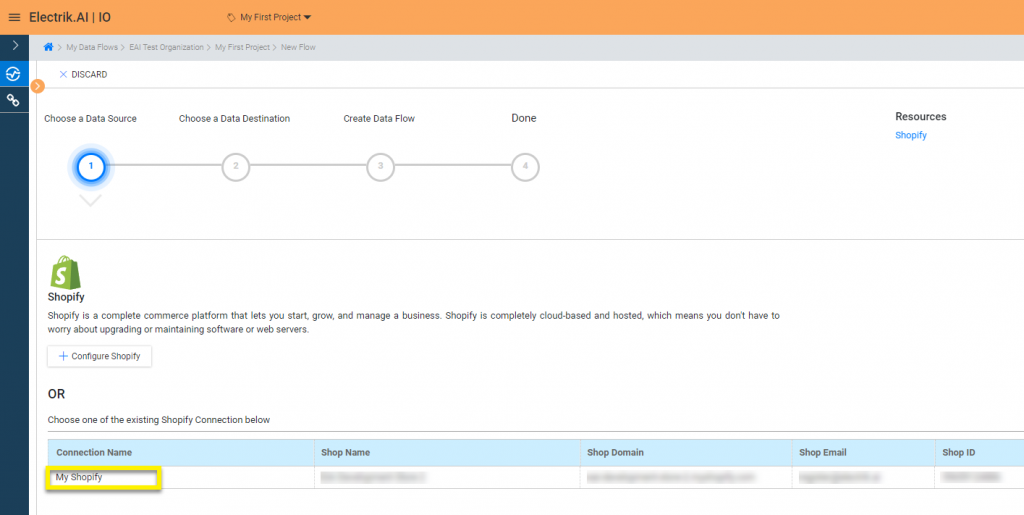
To Configure a new connection, refer to this link.
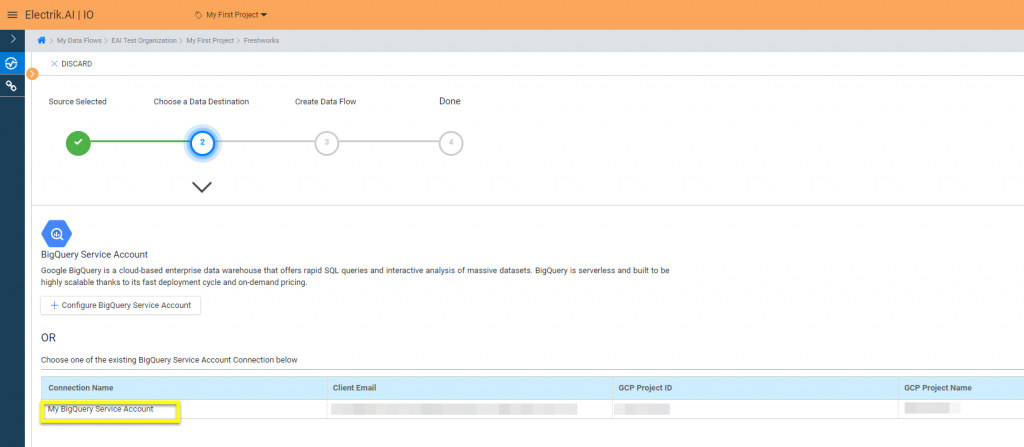
Step 7: Click on a destination of your choice from list of available destinations.
In this example we are choosing BigQuery.

Step 8: Select your existing BigQuery connection in Electrik.AI.
To Configure a new connection, refer to this link.
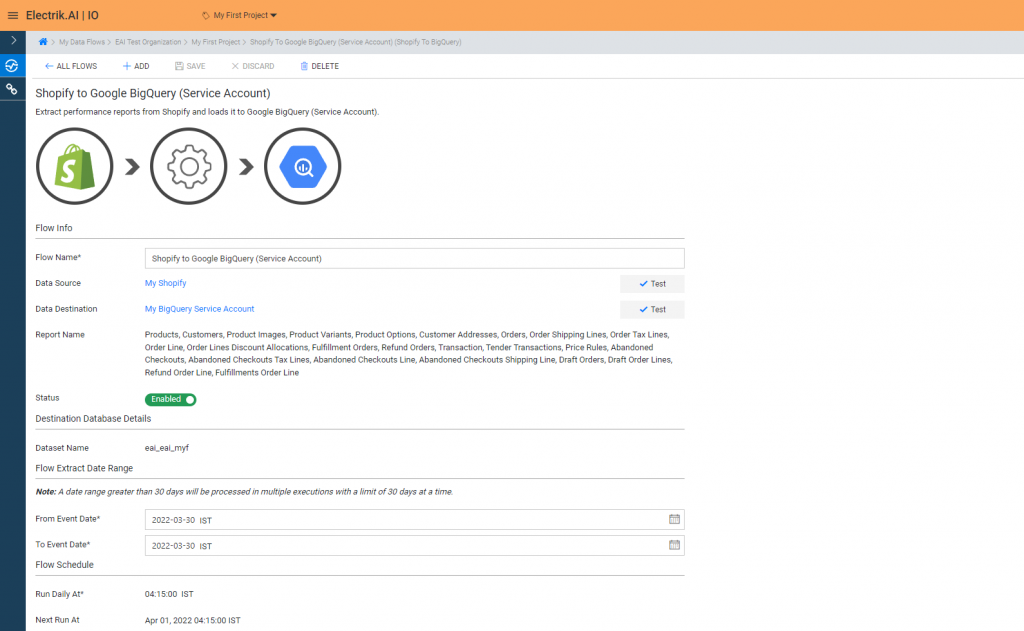
Step 9: Review the Data Source, Data Destination, Data Set, Provide Success Notification Email, Failure Notification Email. Click “Save and Proceed” to continue
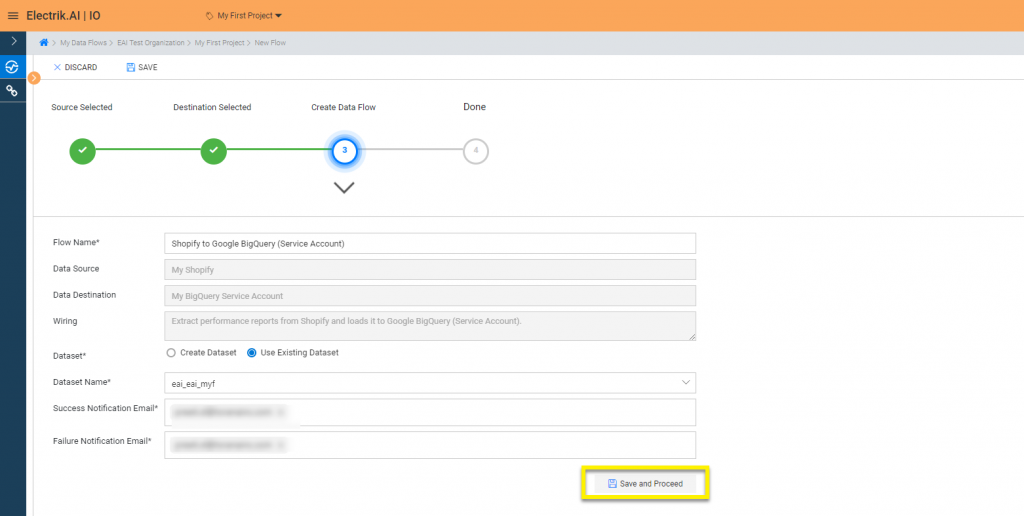
Note:
* By Default, Electrik.AI uses the signed-in user’s Email Id.
* By Default, Electrik.AI chooses an existing Database Schema to load your Shopify Report. You can create a new schema in your database by selecting the “Create New Schema” radio button.
Congratulations, Flow is created. Please wait while you are redirected to Flow Details Screen.
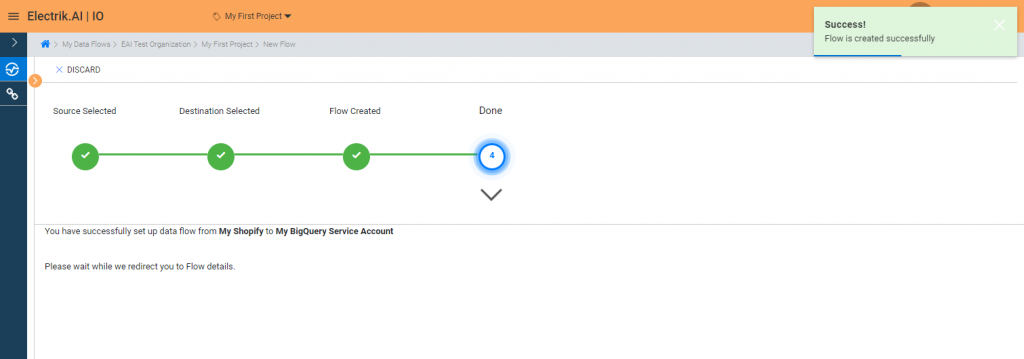
You have now successfully setup Shopify to BigQuery Data Warehouse flow in Electrik.AI
Your Shopify will start loading after 24 hours in your Data Warehouse.
